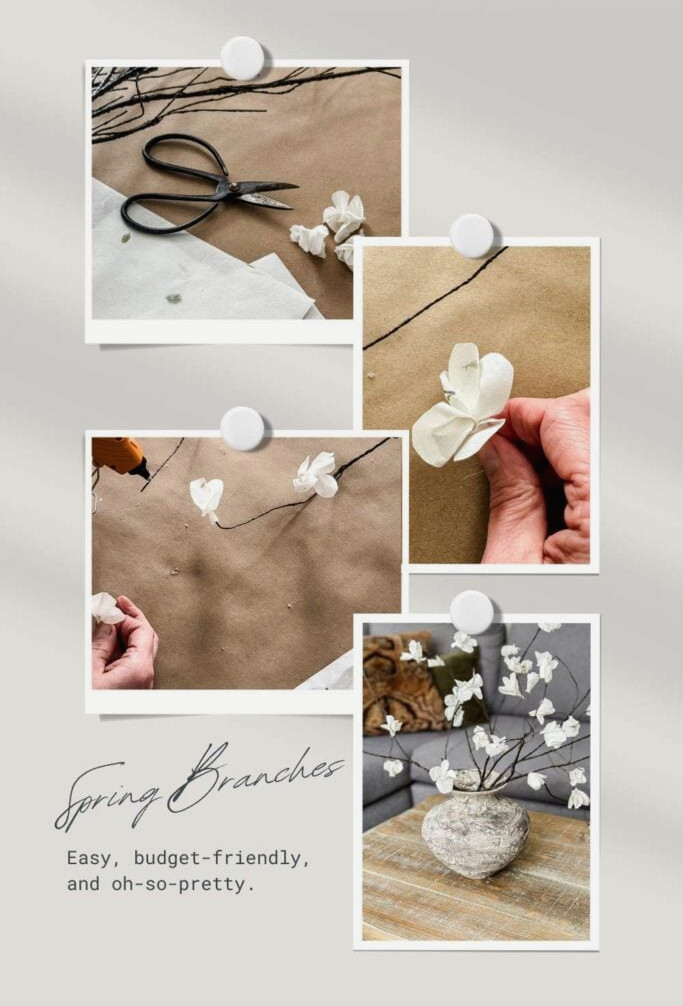
Turn plain branches into a burst of spring color with this simple, affordable DIY idea! With basic paper, a reliable glue gun, and a touch of imagination, you can craft beautiful blossoms that bring a cheerful glow to your home.
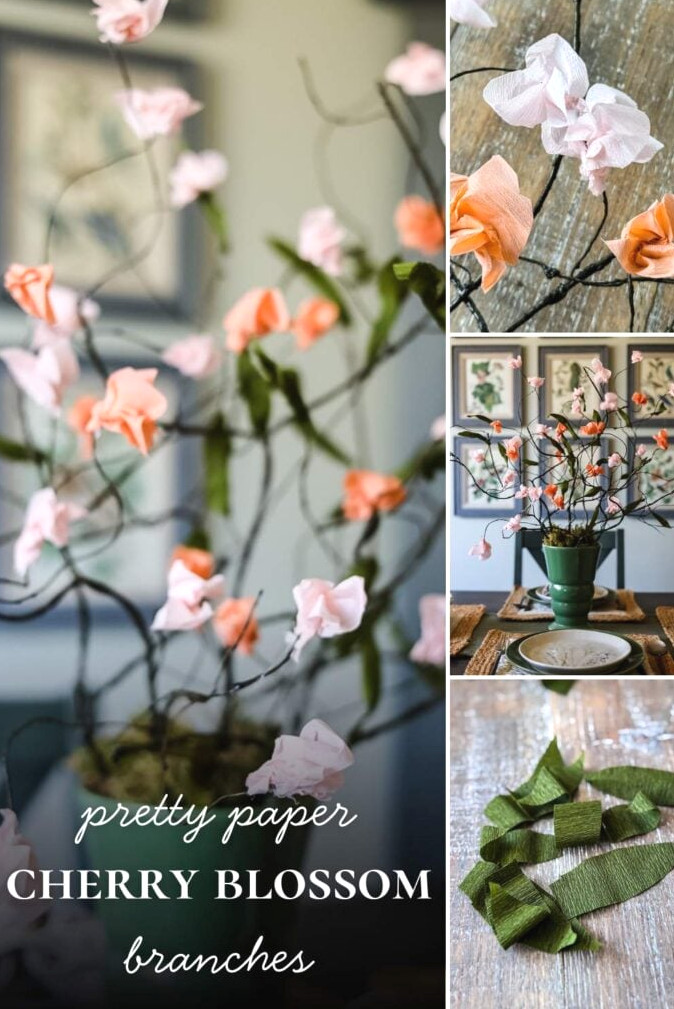
Several years back, I originally posted this tutorial with lightweight rice paper (or tissue paper) to make fast, fluffy flowers that were easy to layer and ideal for beginners. This year, I refreshed the project with a 2026 update by using delicate pink crepe paper to create a more lifelike cherry blossom appearance. Crepe paper adds lovely dimension and organic wrinkles, helping the petals appear and feel far more authentic. Even better, you can personalize the project to match your taste by choosing any paper color you prefer.
After mastering the straightforward method, you can create branches in every shade of the rainbow! The supply list is also wonderfully short: branches (I chose flexible artificial ones, though gathering small branches outside can make this project even more economical), paper, and a glue gun.
Bonus: This tutorial now includes an easy DIY section for making crepe paper leaves, too.
Hello! I’m Jennifer, and since 2019 I’ve been documenting my home’s transformation with an emphasis on practical, affordable style. If you appreciate the warmth of New England design but want it to suit everyday living, you’ve found the right place. I explain each project clearly so you can build a home that reflects your story, without feeling overwhelmed.
Easy Spring Styling: Create These Lovely Paper Cherry Blossom Branches
After trying both options, here’s my candid opinion: Crepe paper creates stunning, dimensional detail that justifies the additional work, although it is thicker than rice or tissue paper, making several layers difficult to use. I cut every scalloped petal layer separately instead, and while that required a little extra time, the textured and natural-looking result made it worthwhile. Whether you prefer speedy, fluffy blooms made with rice or tissue paper or the deeply textured finish of crepe paper, this craft is enjoyable and forgiving either way.
My Newest Video
Supplies for Creating Paper Blossom Branches
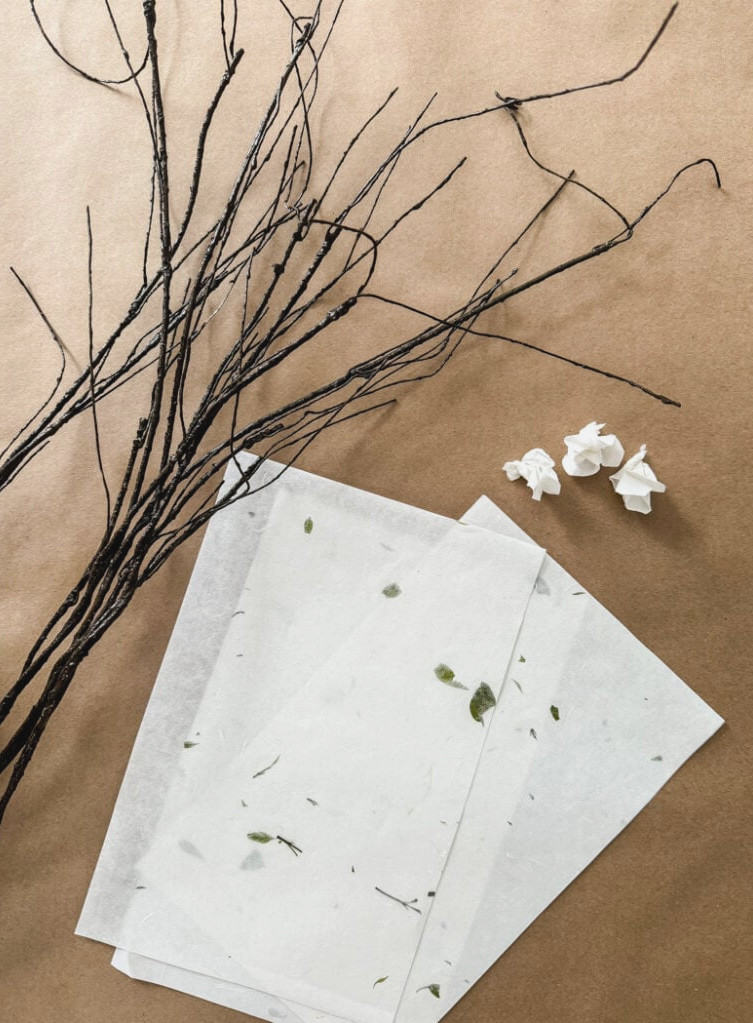
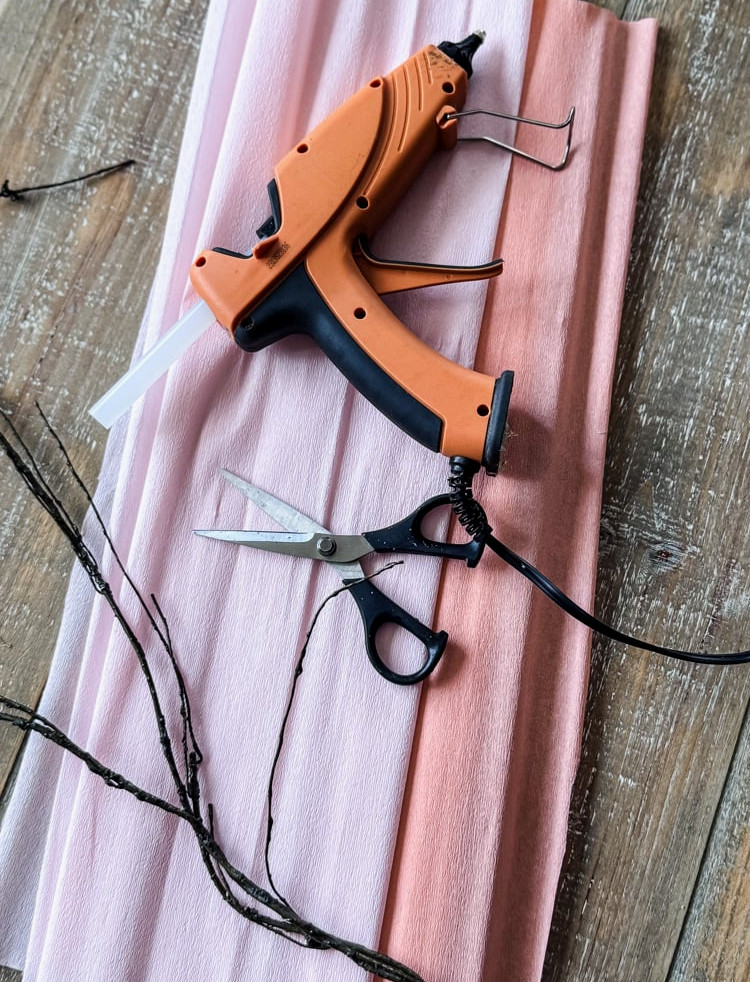
Supplies Needed for This Project
For your flowering branches, select any tissue, crepe, or rice paper color that appeals to you. When I originally created these blooming branches, I had this rice paper stored among my craft supplies and decided to make use of what was already available (using a free option is always best!)
If tissue paper is more readily available to you, white tissue paper will produce a look like mine. However, I especially adore this champagne-colored tissue paper because it resembles cherry blossoms.
Creating Paper Blossoms with Crepe Paper
Whether you choose crepe paper or thinner tissue/rice paper, the general method remains the same. I’ll begin by showing you the crepe paper cherry blossom branches I made most recently.
Step 1: Slice the Paper Strips
For this cherry blossom design, I chose crepe paper in two gentle shades: pale pink and an especially soft peach. Together, they give the flowers a beautiful, natural variation. Since my crepe paper sheets measure 20 inches across, I cut the strips to widths ranging from 1.5 to 2 inches. There’s no need to aim for perfection in this project, so don’t worry about this step; slight differences in flower size add charm.
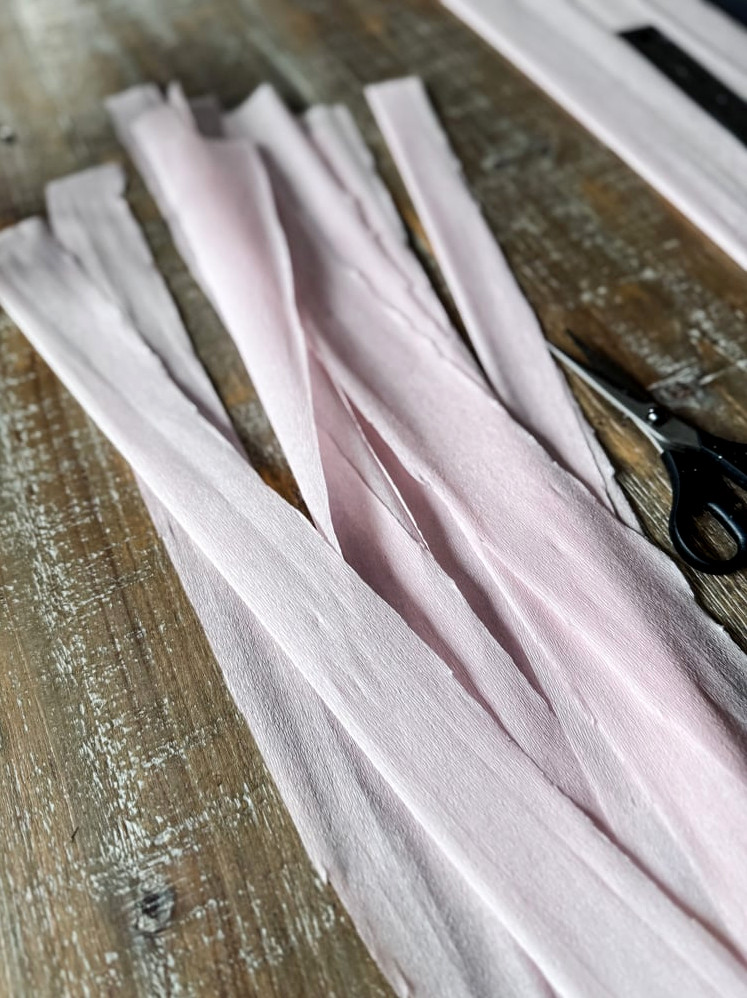
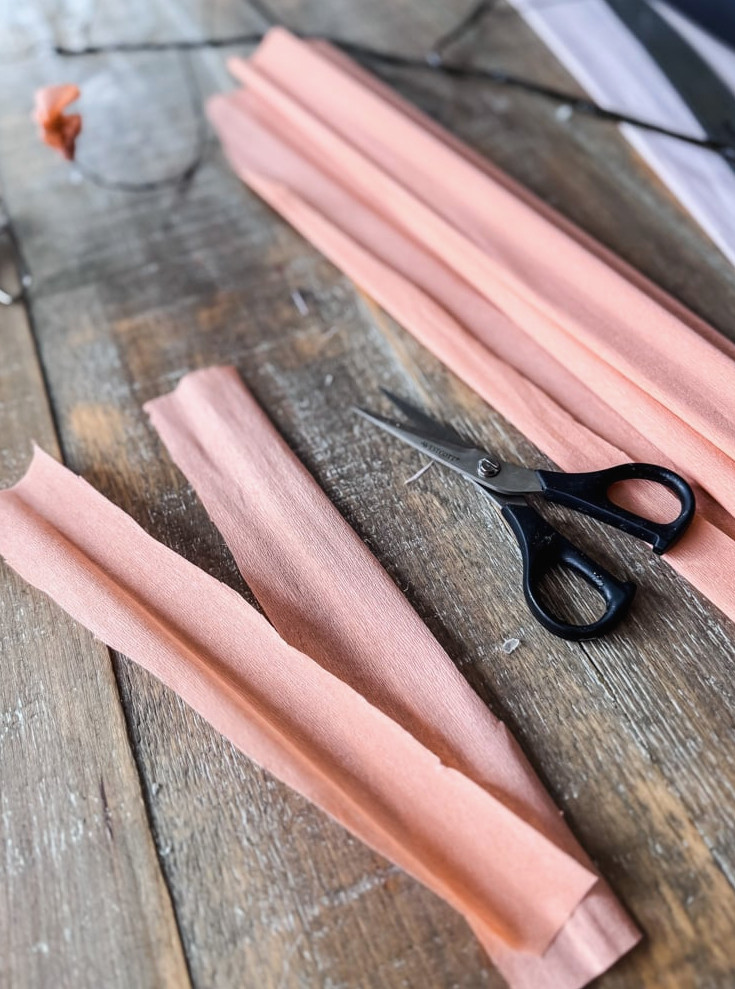
Step 1: Slice and Fold the Paper Strips
- Slice the crepe paper lengthwise into strips measuring 1.5 to 2 inches wide. When working with 10-inch-wide paper, leave out the following step.
- Take each 20-inch strip and fold it lengthwise in half, then cut along the crease.
Step 2: Shape the Edges into Scallops
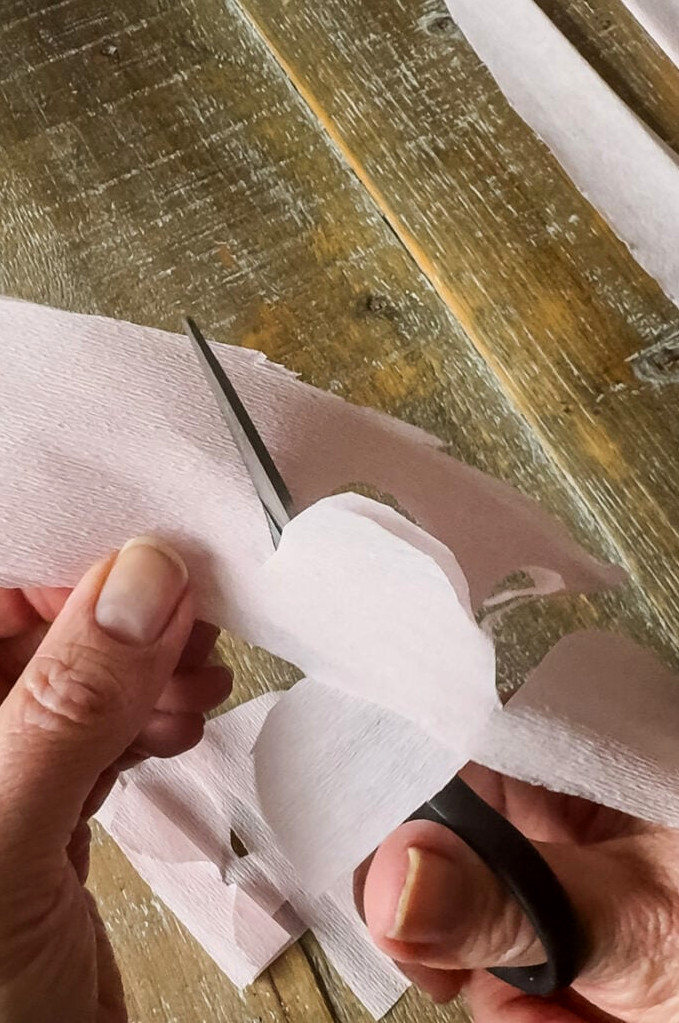
This is the one stage that varies slightly when compared with tissue paper. The reason is that crepe paper is both thicker and more textured:
- Handle one folded strip at a time. Unlike lightweight rice paper, crepe paper is hard to stack and cut neatly in several layers. For me, two sheets were the limit
- With a sharp pair of scissors, make 5-6 soft scalloped cuts along the unfolded raw edge of the strip. These shapes will form the petals, so exact uniformity isn’t necessary!
Step 3: Shape the Flowers
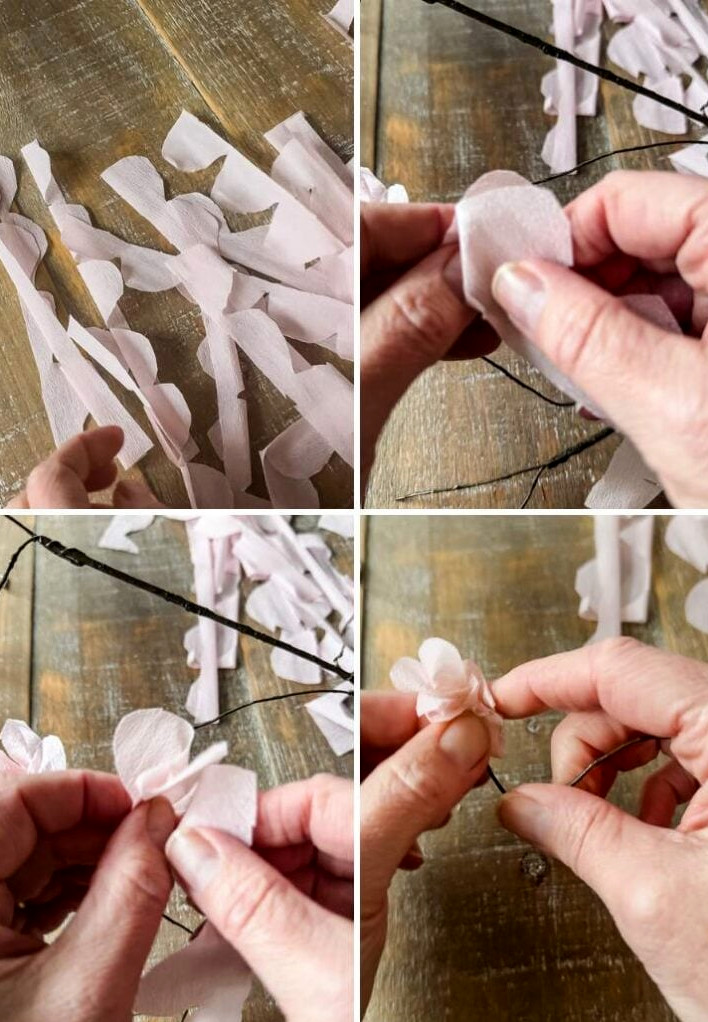
- Begin Pleating: Take hold of one end of the folded paper strip. Fold it backward and forward in small, accordion-style pleats, collecting the paper around your fingers.
- Fasten the Base: After the full strip has been gathered into a ruffled bundle, tightly twist the straight bottom edges together. This forms the flower’s center & stem, which is where it will be glued to the branch.
- Open the Blooms: Carefully spread and fluff the scalloped “petal” edges with your fingers so the blossom opens up.
Step 4: Putting Together The Cherry Blossom Branches
Once your hot glue gun is prepared, place atiny dot of glueright onto the tip of a branch. Swiftly push the twisted base of a paper blossom into the glue and keep it in place for several seconds until secure.
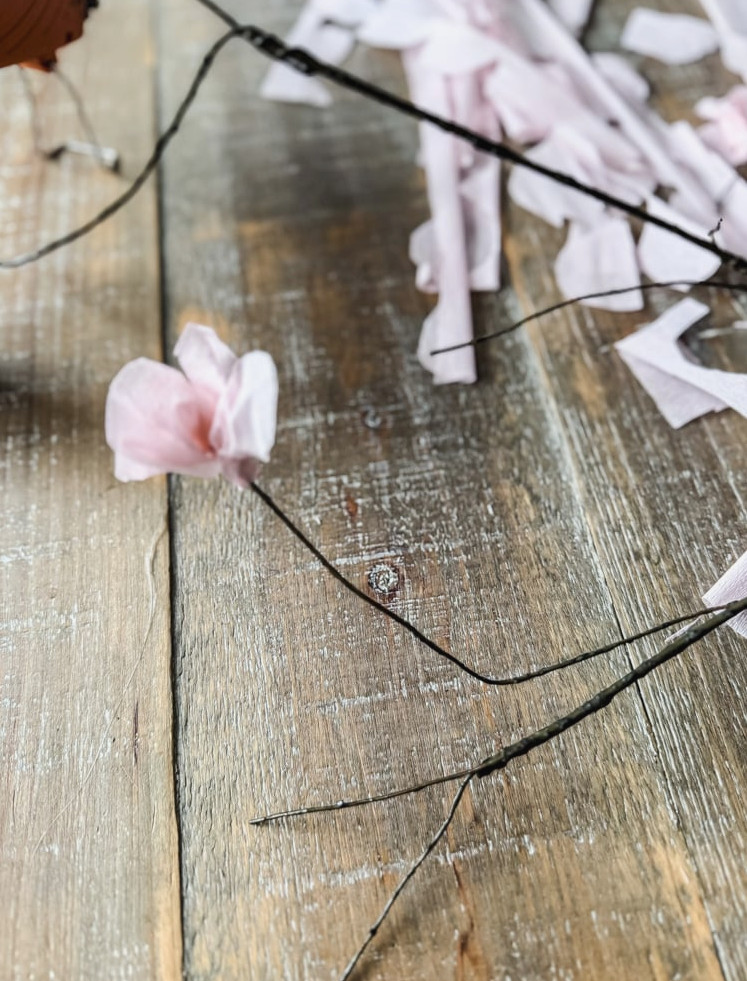
I prefer to create each blossom and attach it to the branch right away, while the paper remains simple to mold.
- Get the Glue Ready: Heat your hot glue gun and keep it nearby. Keep in mind: only use a little glue. A small, pea-sized bead is sufficient. Excess glue may bleed through the paper and appear untidy.
- Fasten the Blossom: Dab a small amount of glue onto the very end of your branch. Quickly push the twisted paper base of the blossom into the glue. Hold it firmly for a few seconds while the glue hardens. Always wear silicone finger protectors to avoid burns!
- Pro-Tip for a Seamless Finish: For the neatest result, put the glue on the branch rather than on the paper. This keeps the glue from spilling across the fragile petals. Once attached, gently pinch and fluff the blossom’s base around the branch tip to conceal it entirely.
**Always use silicone finger protectors to safely press the delicate paper onto the hot glue.**
My Completed Branch Formula:
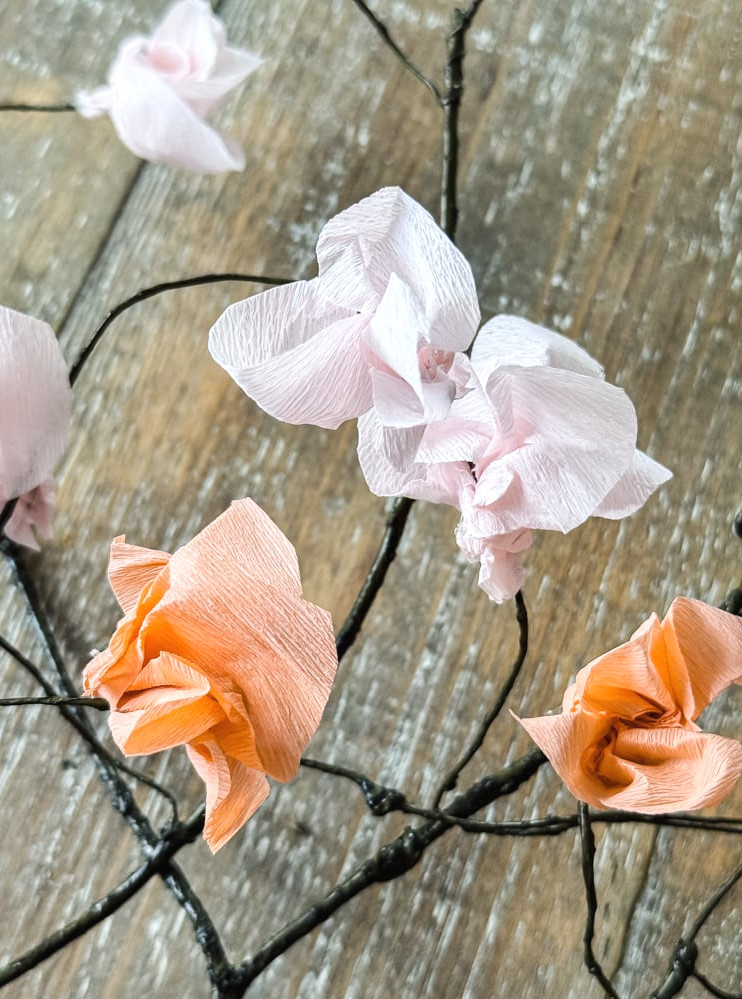
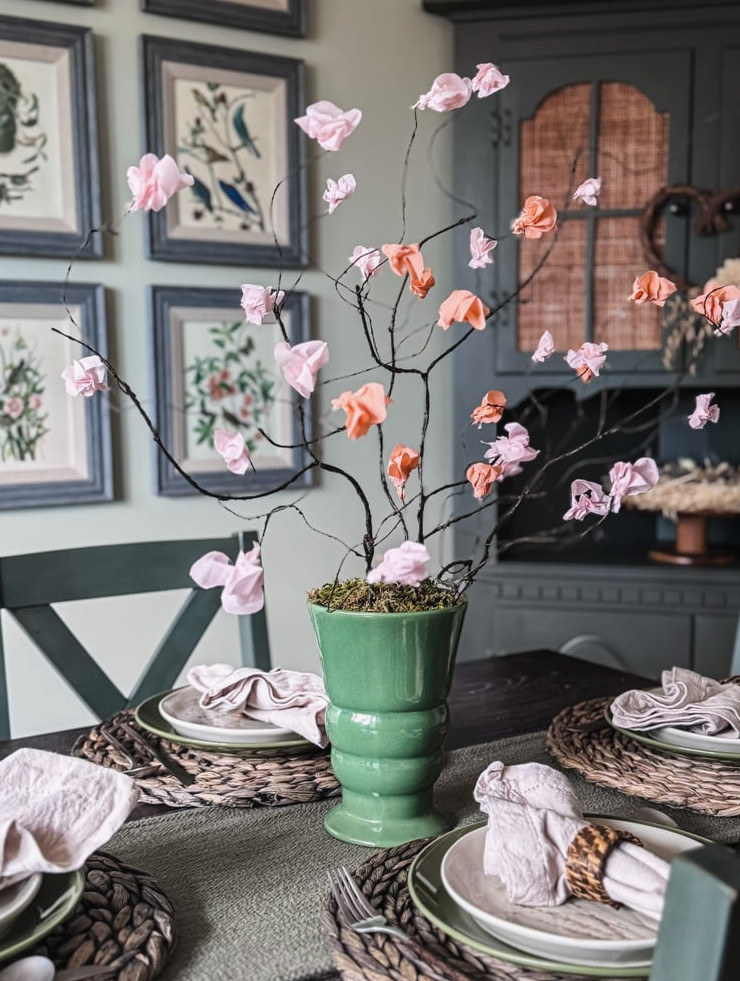
A Note on Styling & Color: For every completed cherry blossom branch, I combined 7 pink blossoms with 3 peach ones. This provides a beautiful, natural variation in color. I also kept some of the smaller offshoots on the artificial stems bare, helping the arrangement feel more organic and not overly busy.
Keep in mind, this is your creation! Group several blossoms at a branch tip for a fuller appearance, or leave the design light and delicate as I did here. This guide highlights an easy, beginner-friendly approach, but after learning the basic blossom, the creative options are limitless!
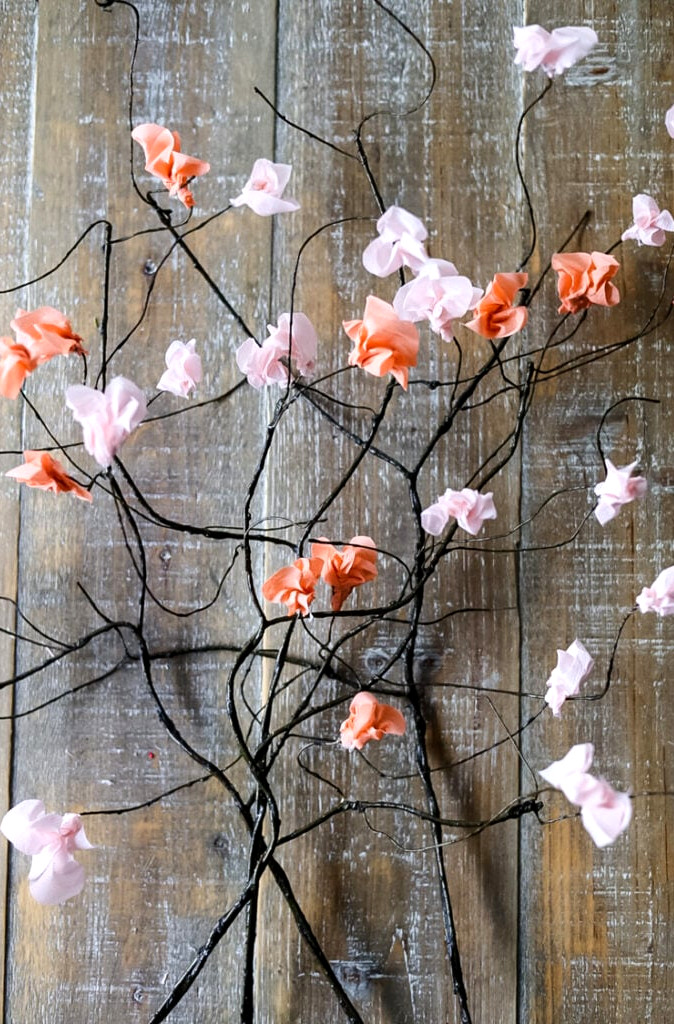
- Color Combination: I selected 7 gentle pink and 3 gentle peach blossoms for each main branch to create a soft, natural mixture.
- Placement: I attached blossoms to the tips of the primary stems and several larger offshoots, leaving many of the smaller, fragile twigs uncovered. This provides a balanced appearance.
- Your Turn: You can personalize this however you like! Form fuller clusters by attaching 2-3 blossoms together at a single spot, or choose a simple, minimalist design. This tutorial teaches the essential technique. The final look is up to you!
The Original Technique: Tissue or Rice Paper
These updated cherry blossom branches use the same basic technique as my first project. If tissue paper or rice paper is available, use the same process to cut strips and form scalloped petals.
Step 1: Trimming The Scalloped Edges
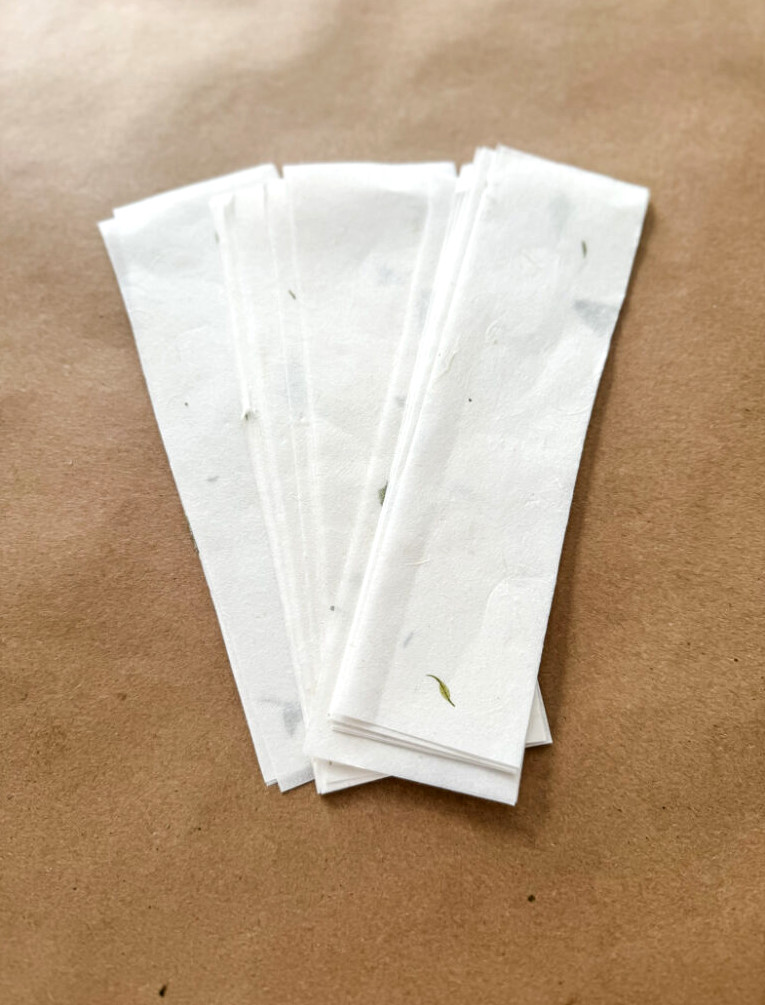
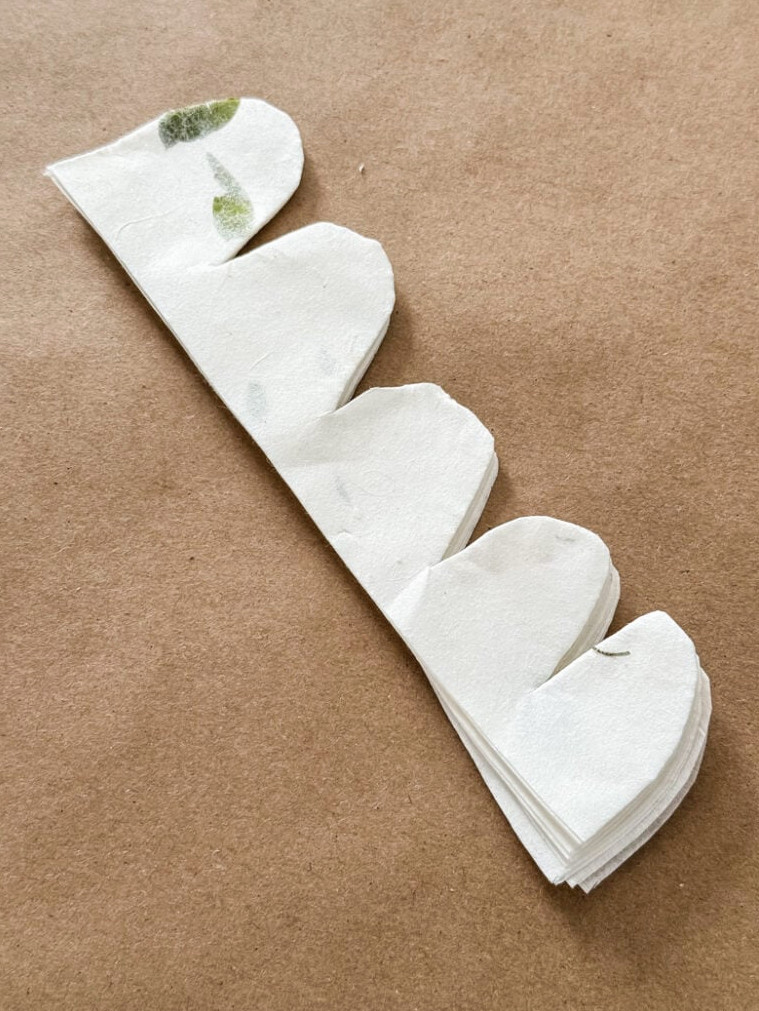
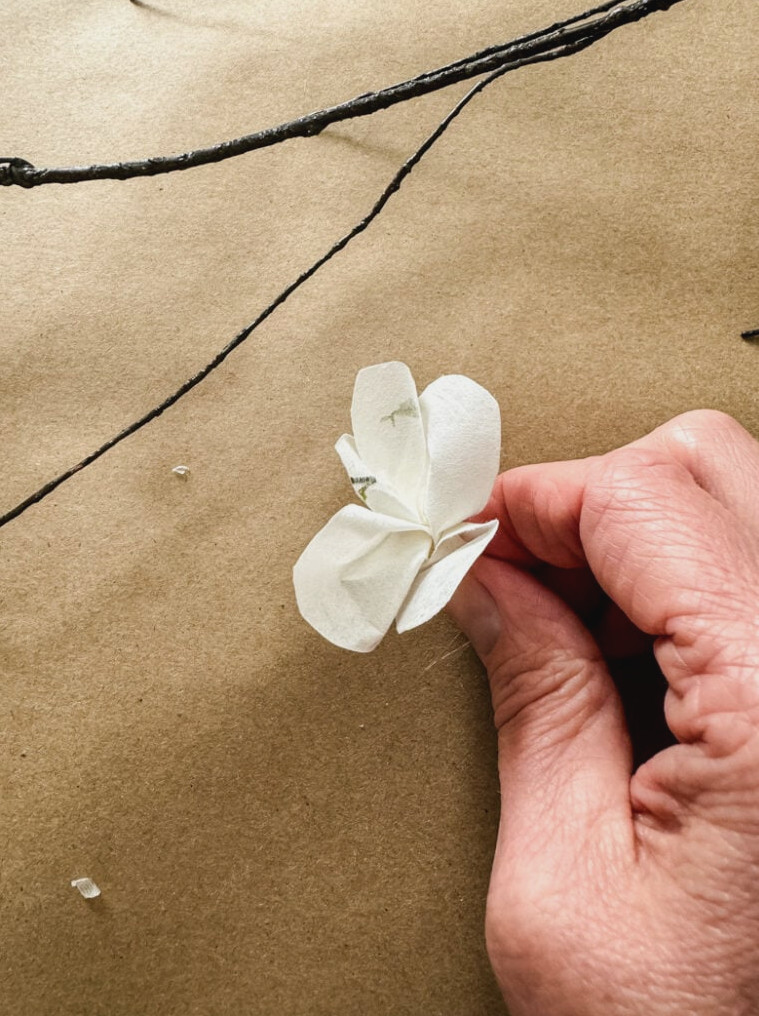
After cutting your paper strips, create scallops along one side to shape the petals. Since tissue and rice paper are more delicate, you can stack several strips together before making the scallops.
As a general guideline: on an 8-inch strip, make 5 scallops; on a 10-inch strip, make 6. Keep in mind that they don’t need to be flawless!
- 8-inch paper strip = 5 scallops
- 10-inch paper strip = 6 scallops
Step 2: Curling the Borders
Although this part is optional, it makes the completed blossoms appear considerably softer and more lifelike.
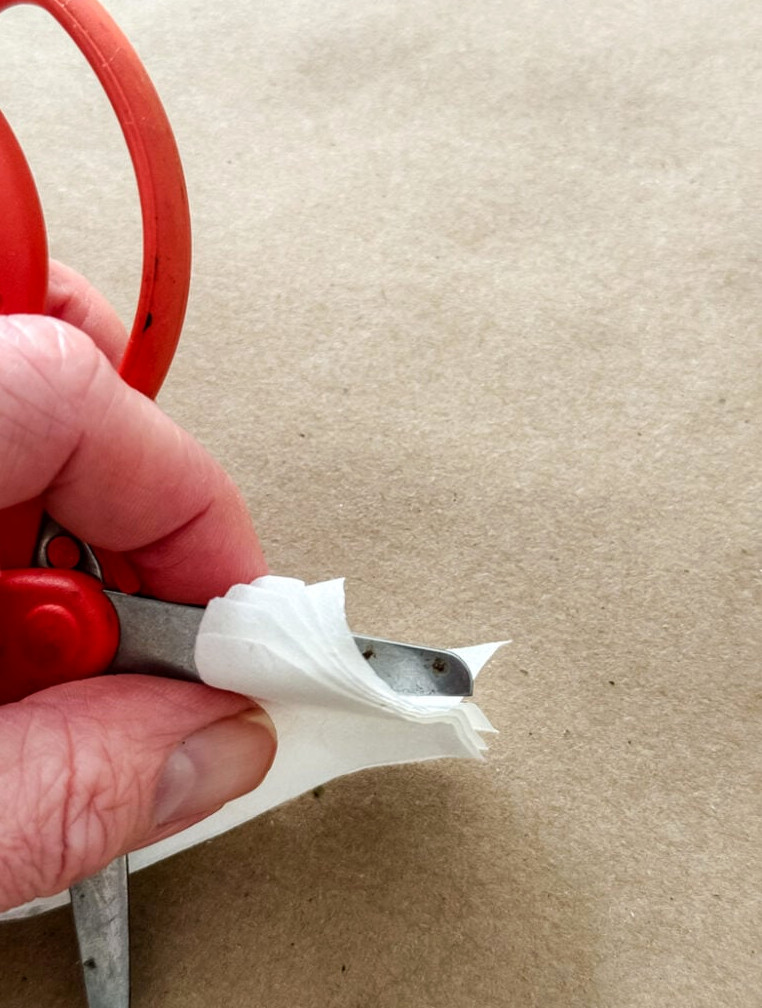
How To Curl the Borders:
- Keep your scissors open. Slip the paper strip between the blade and your thumb, as though you were holding a ribbon.
- Using one fluid, steady motion, draw the strip through while lightly pushing the blade against it. The scalloped edge will gently curl outward.
- A safety suggestion: I find this technique much simpler and safer to manage with blunt-tipped children’s scissors.
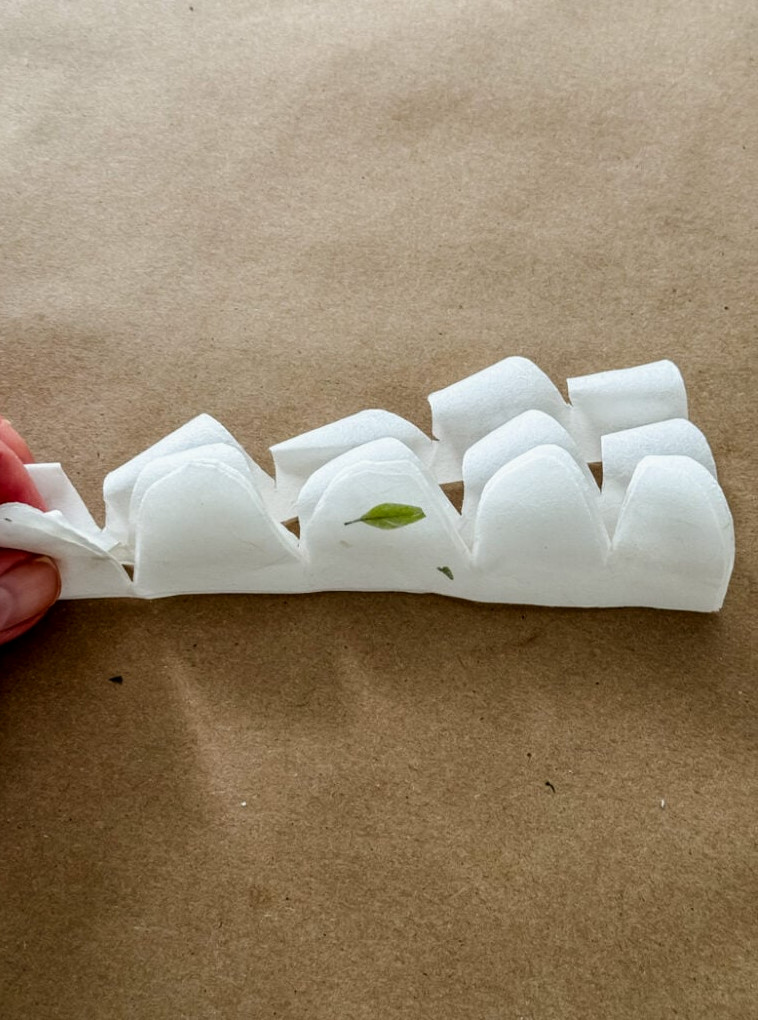
The swift pulling motion makes all the difference—don’t saw back and forth.
Step 3: Shape & Secure Paper Blossoms
Creating the tissue/rice paper blossoms and attaching them to the branches follows the same process we used for the crepe paper cherry blossom branches.
1. Shape the Blossom:
- Grasp one end of your prepared paper strip (the one with scalloped edges).
- Using your free hand, fold the full strip back and forth into compact, accordion-style pleats, gathering it into a ruffled cluster.
- Twist the straight lower edges of the gathered paper tightly together to create a firm base. This twisted section is the part you will glue.
2. Secure It to the Branch:
- Apply a tiny drop of hot glue to the end of your branch.
- Press the twisted paper base of the blossom into the glue right away.
- Keep it held there for several seconds until the glue hardens. For protection, use a silicone finger guard
This basic method provides the groundwork for countless combinations of colors, paper varieties, and arrangement designs.
Creating Natural Greenery: DIY Paper Leaf Branches
Supplies for Paper Leaf Branches
A Midnight Discovery & A Morning Solution: Time for a Confession
Yesterday, I put together my new cherry blossom branches, arranged them, andcaptured what I believed were the last photos. Yet yesterday evening, I experienced a designer’s realization—the setup was lovely, but somehow a little… lifeless. It needed some greenery! So, first thing today, I got to work refreshing it with these easy paper leaf branches.
Step 1: Shape the Leaves
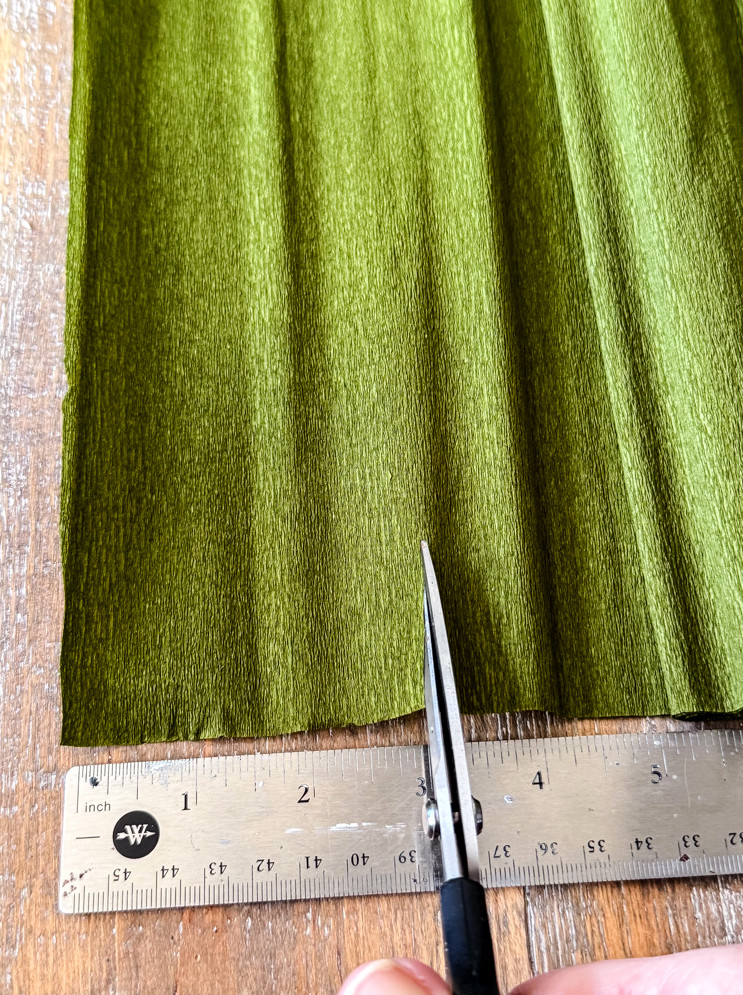
- Slice the green crepe paper into strips about 3 inches wide.
- Layer or fold the strips together so several pieces can be cut simultaneously.
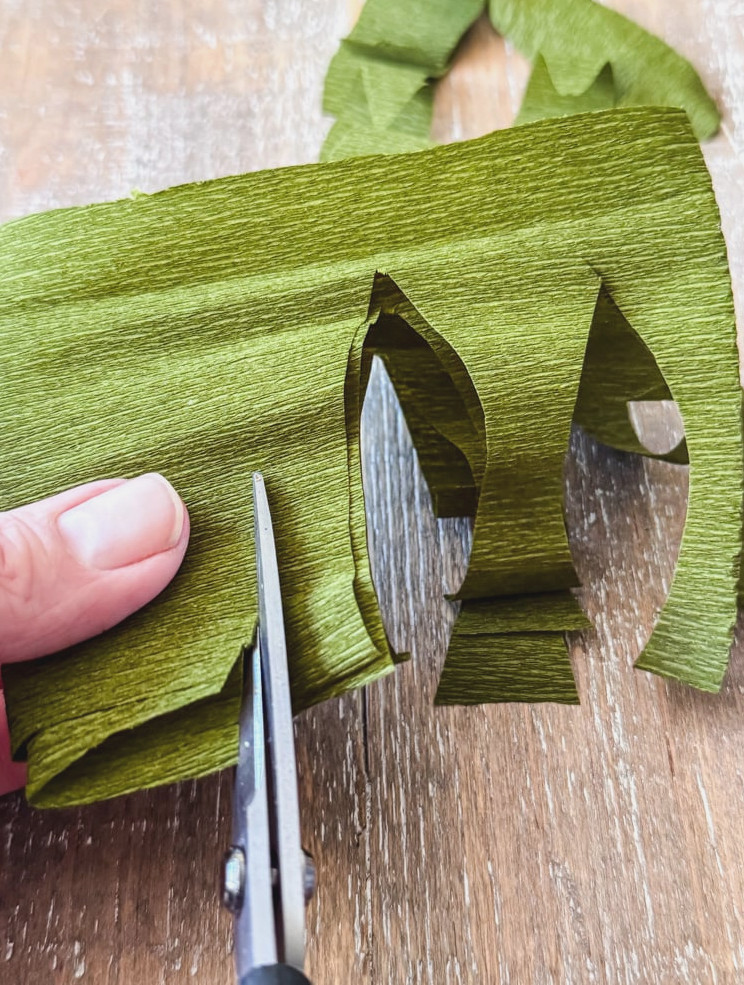
- Cut basic, slender leaf forms by hand from the strips.
- There’s no need for perfection—differences make them appear more natural.
Step 2: Get the Leaves Ready
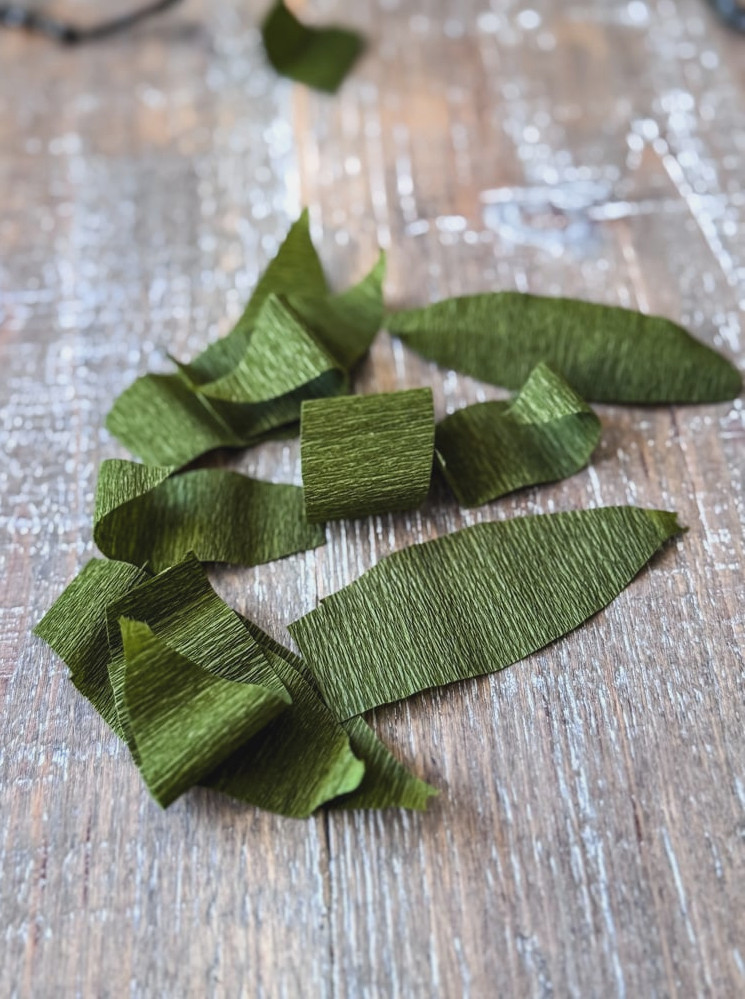
- Fold every leaf gently in half lengthwise to form a crease down the middle. This serves as the leaf vein and creates a firm fold line for attaching it with glue.
- Plan on using roughly 12 leaves per branch for a lush, lifelike appearance.
Step 3: Secure the Leaves to the Branch
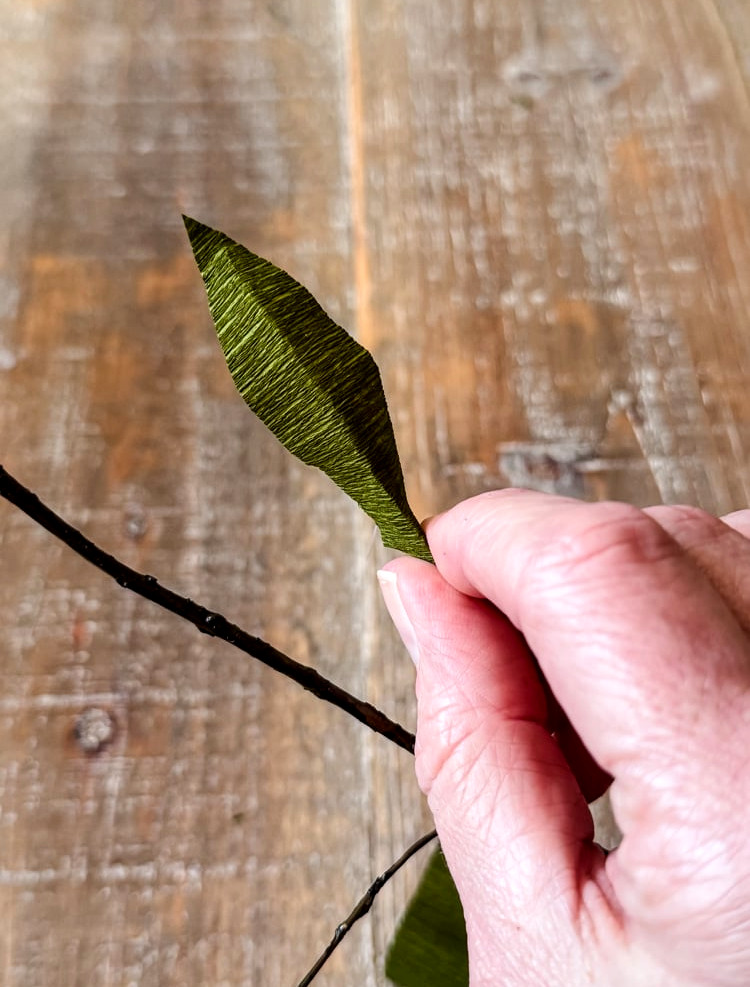
- Apply a narrow line of hot glue along the last 1-2 inches at the end of a branch.
- Before the adhesive cools, carefully place the leaf’s center crease (the “vein”) straight onto the glued part of the branch.
- Shape the paper softly with your fingers right away, bending the leaf to give it a realistic, dimensional form.
- Continue down the branch, changing the leaf angles as you go, until the branch has the fullness you want.
Completed Paper Leaf Branch
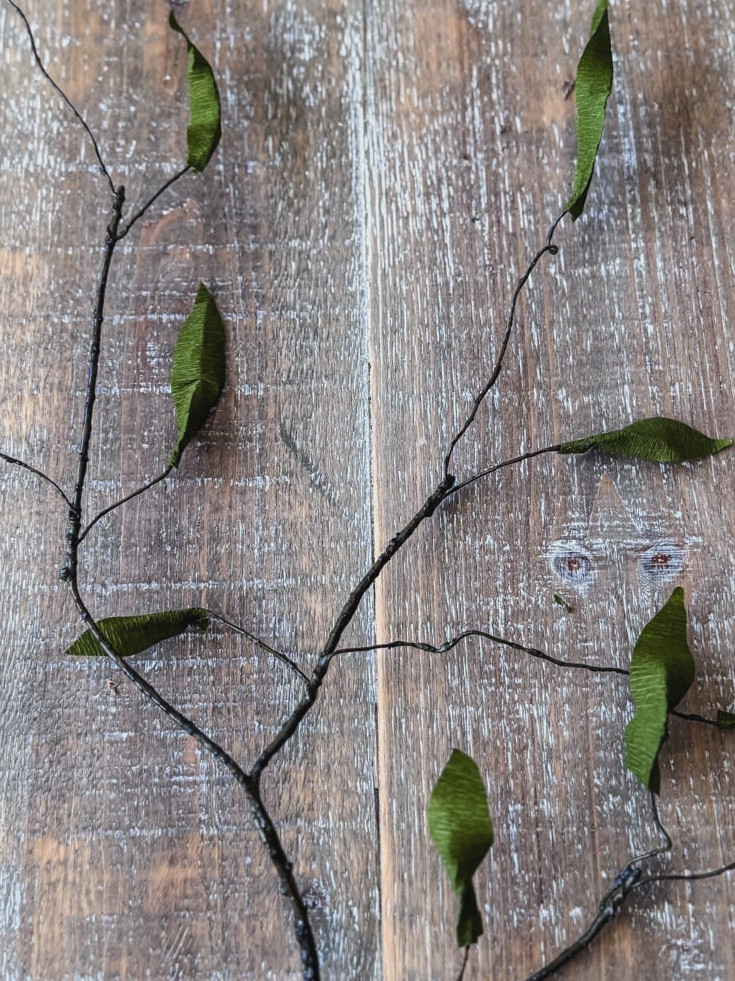
Every primary branch on the faux willow stem receives one full-size leaf. Since the smaller side shoots could appear overpowered, I reduced their leaves by trimming straight across the bottom of each paper leaf. This quick modification gives the arrangement a far more realistic and balanced appearance.
Seasonal Styling: Updated Version
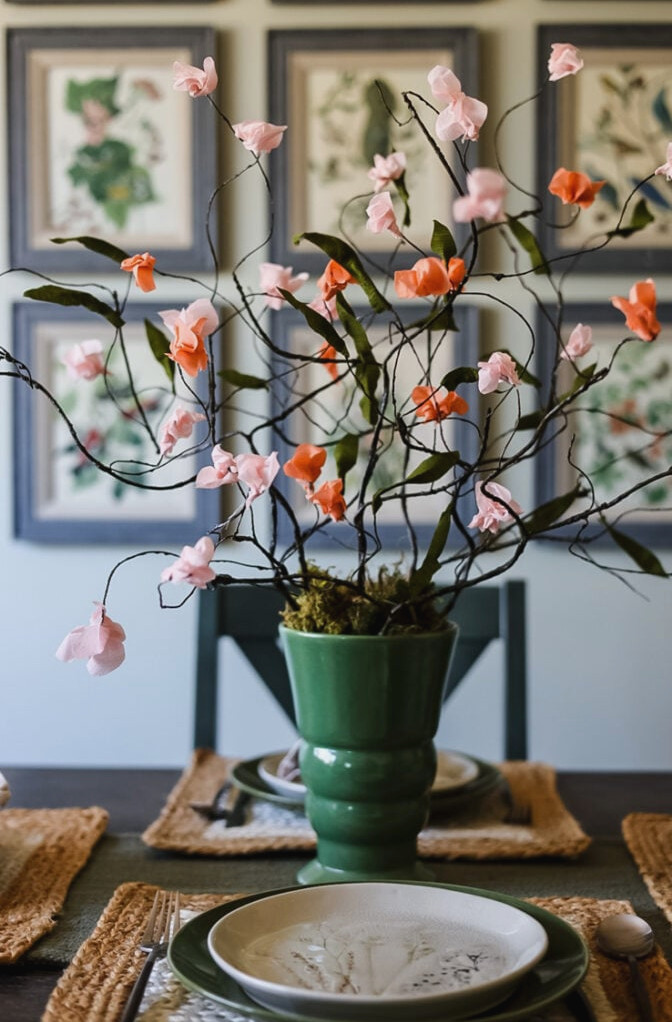
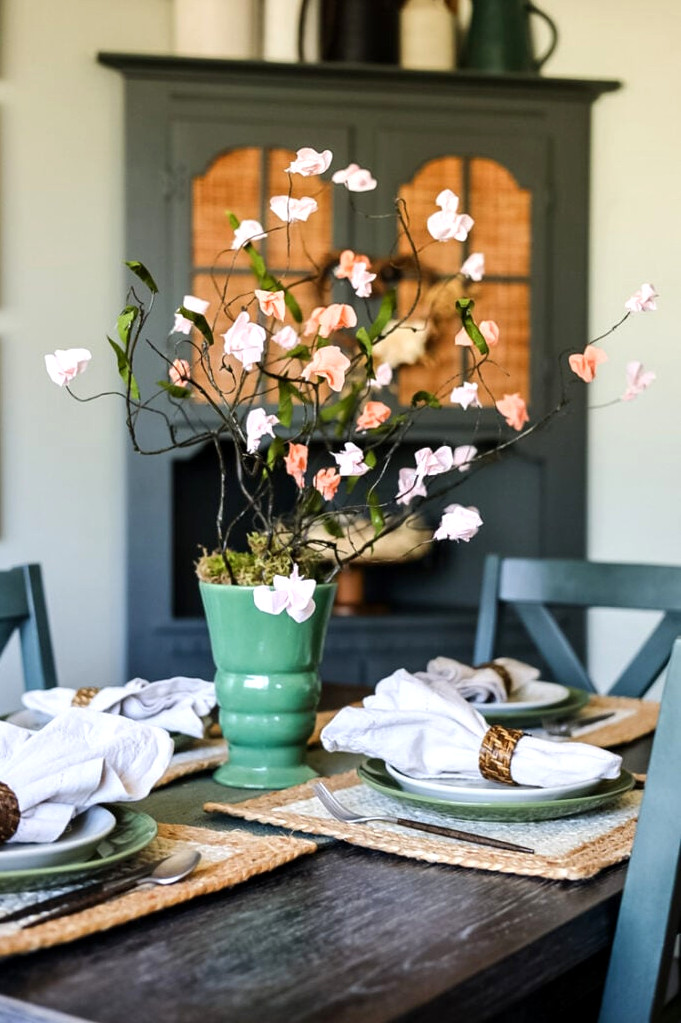
A DIY project doesn’t feel complete until it has been arranged in your home! To spark some ideas, here’s how I paired the cherry blossom stems with the green leafy branches to bring a light Spring atmosphere to my dining table ( a girl can dream about Spring, right?).
You can also receive my latest bird digital downloads at no cost when you sign up to become an email subscriber below(I promise I’m not spammy, just send out the latest!).
Expert Tip for a Flawless Vase Arrangement
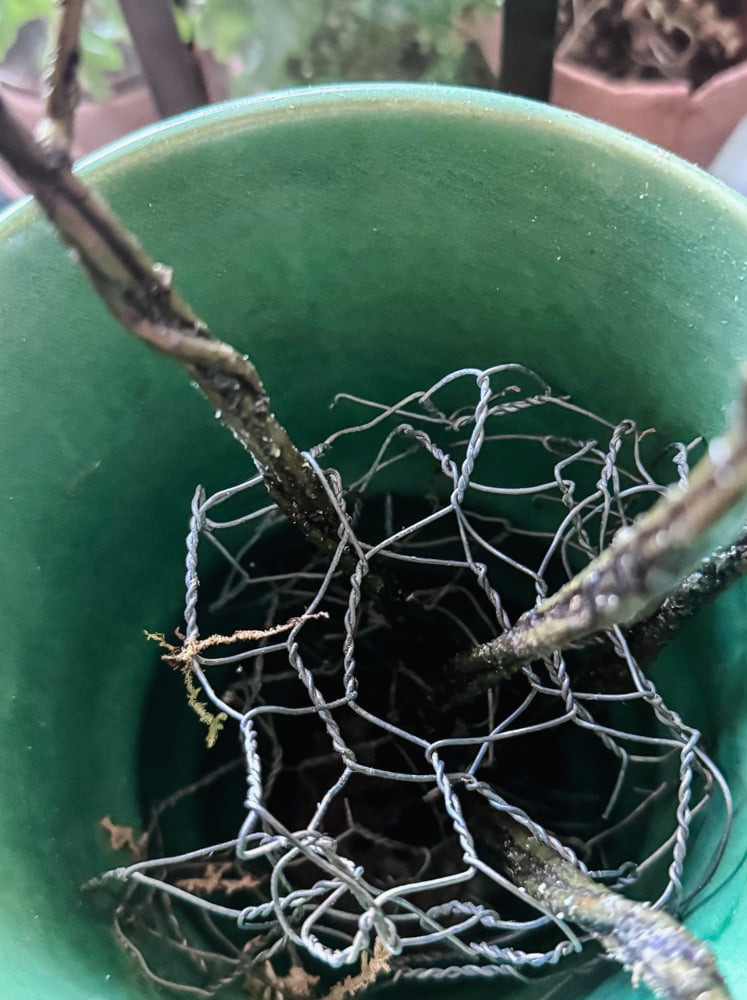
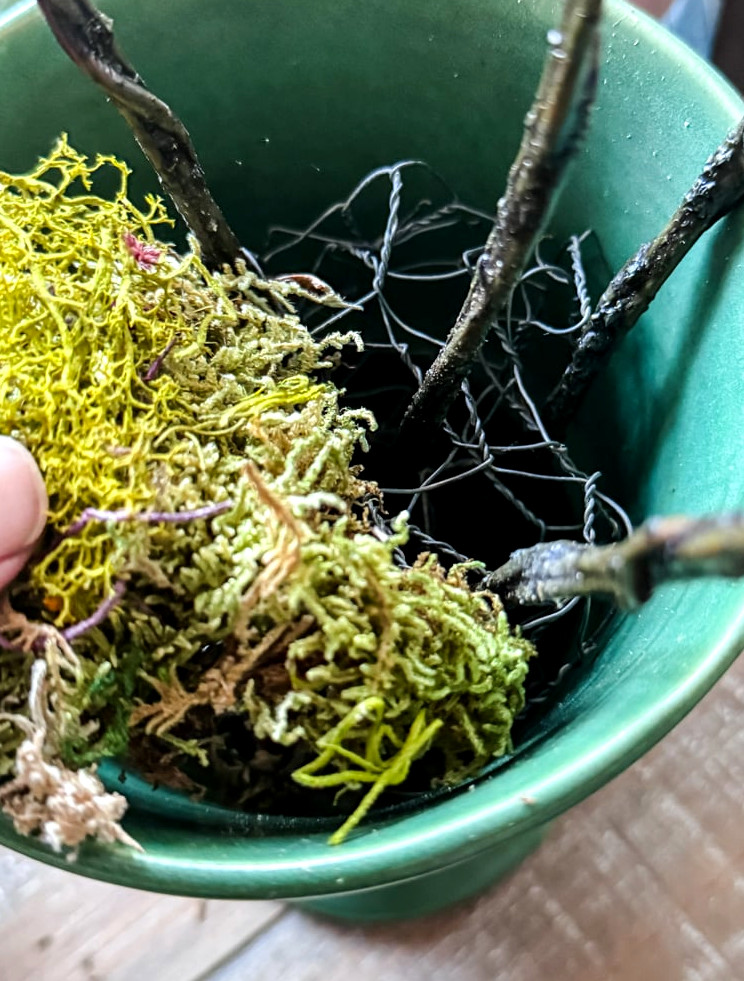
To anchor your paper branches firmly, try this traditional florist technique: crumple a small section of chicken wire and set it inside the base of your vase. The stems will settle neatly into the wire. To give this faux arrangement an organic appearance, conceal the wire by placing bits of sheet moss around the rim. It’s also an excellent method for fresh flowers!
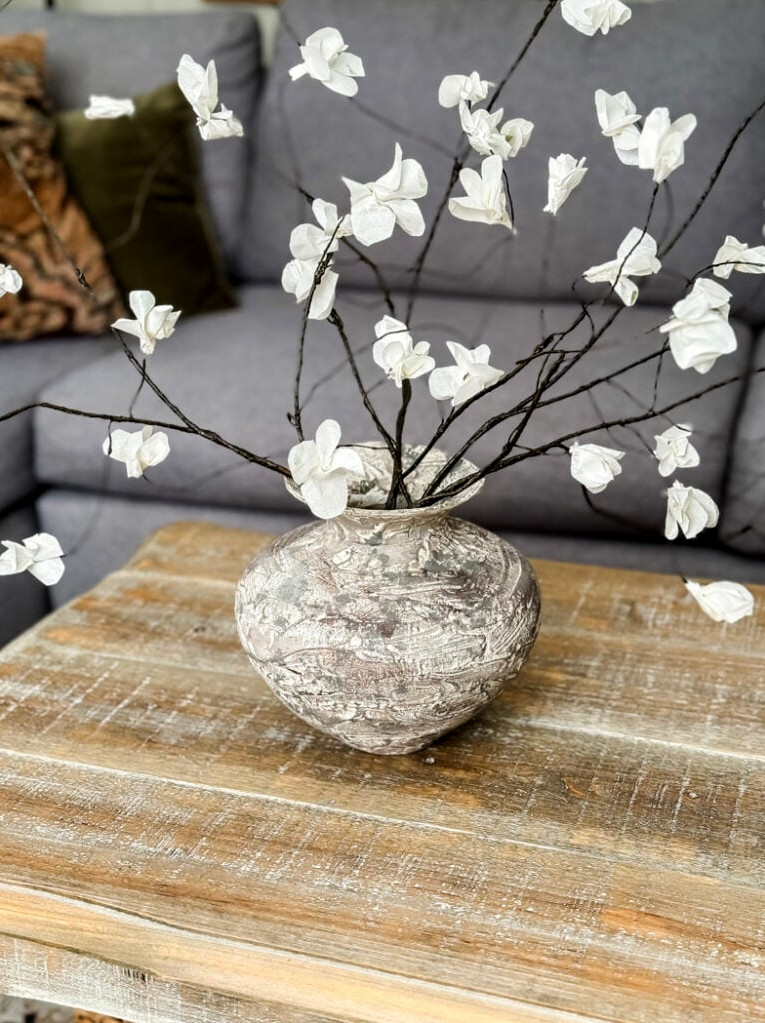
Blooming Branches: Original Version
What I enjoy most about a simple DIY project like this is the instant reward! In less than an hour, you can create a beautiful collection of branches ready to display. Whether you choose the updated cherry blossom style using crepe paper, the timeless airy design made with rice/tissue paper, or include lifelike green leaf branches to finish the arrangement, you’ll have a personalized piece of spring decor that stays lovely throughout the season.
A quick word about the branches: You’ll find plenty of options online, but these flexible willow stems are my favorite (around $15 for a set of 10). They make an ideal foundation-I’ve used them for everything from these paper blossoms to my Moss Branch DIY Project. No need to wait for finicky real branches to behave. These delicate paper beauties are ready to freshen up your home whenever you wish, lasting well beyond the season’s final gloomy snow cloud.
Gather your dependable glue gun and whichever paper appeals to you—pink crepe, peach tissue, or green paper for the leaves-and let’s begin creating! I promise, arranging your own faux flowers will brighten your spirits. And if someone asks, simply wink and say, “Shh, they’re not real… but aren’t they fabulous?”
Showcase your creations! If this project or any of my other DIY ideas has inspired you, I’d be delighted to see your work and feature you in the Reader’s Spotlight gallery. Email me a photo at jennifer@cottageonbunkerhill.com
Hugs, Jennifer
Flowering Branches
Do-It-Yourself Project
Browse My Amazon Shop