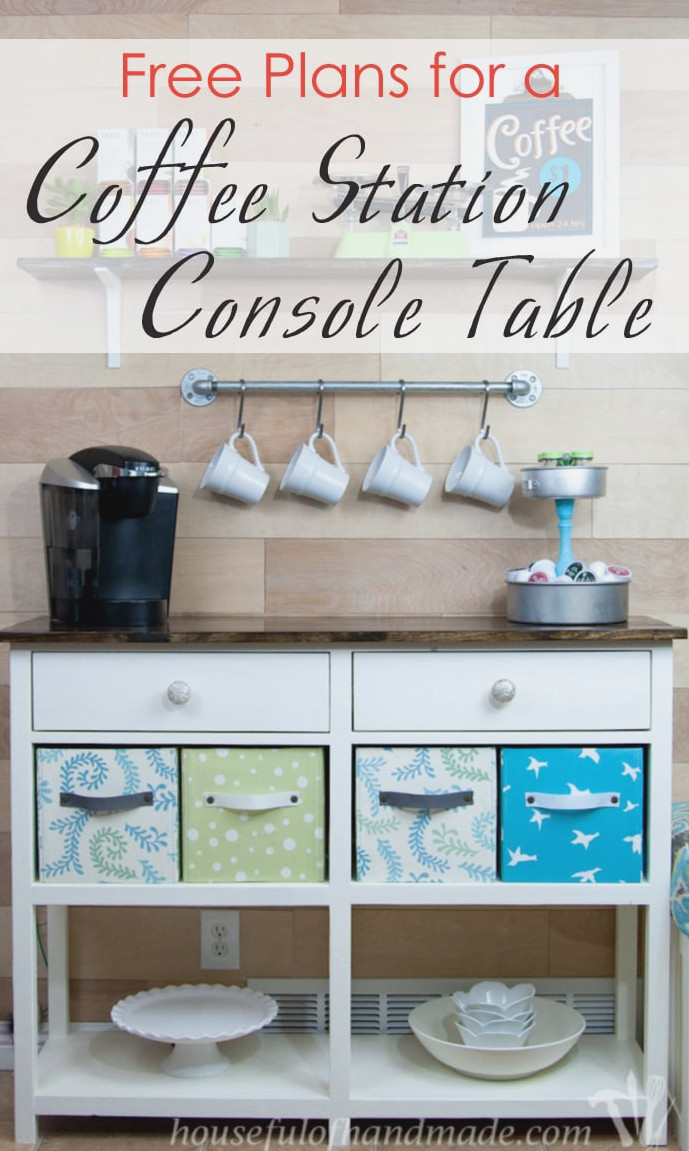
Create a coffee station in your kitchen using these simple coffee bar table woodworking plans.
Our kitchen immediately seemed more elegant after we added a coffee bar! It also simplifies mornings since everything I need to get going is kept in one spot.
The centerpiece of our coffee bar is the straightforward coffee bar table I built on my own. This was among my first substantial projects. It is beginner-friendly while still giving you a chance to practice your skills.
Once finished, however, you will have a beautiful console table suitable for any room in your home. I strongly recommend adding a stylish coffee station to your kitchen!
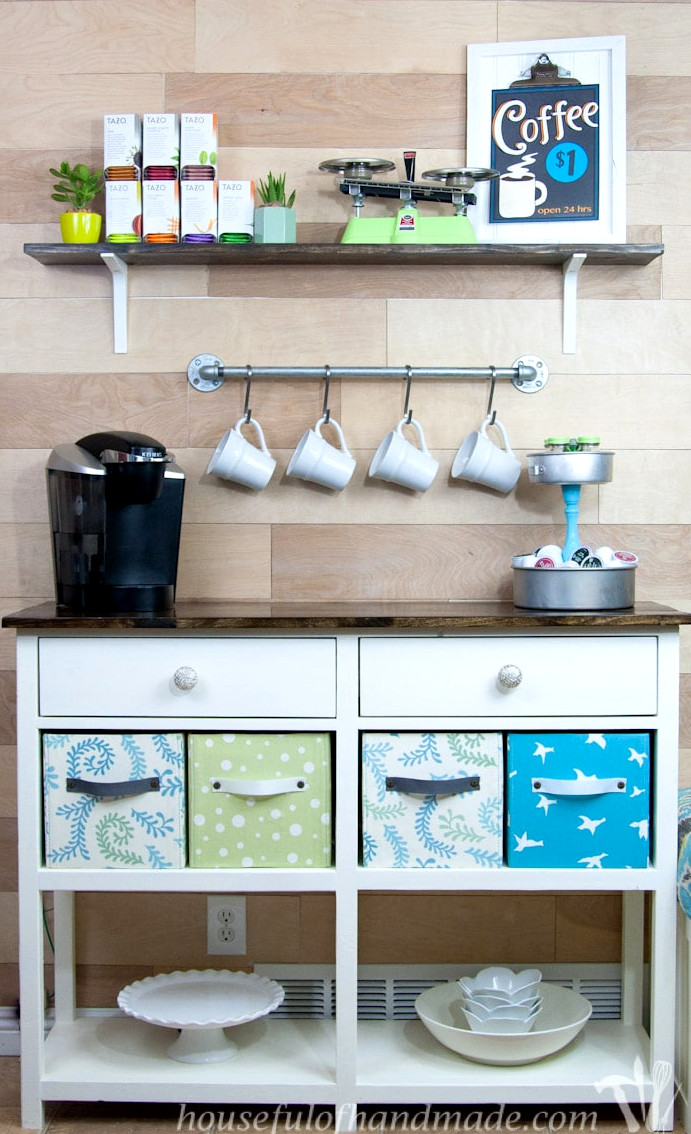
Console Table Featuring Drawers
Storage was essential when we added our coffee bar table! We required somewhere to keep all the coffee station supplies and other items.
Two drawers are positioned at the top of the coffee bar table. They are ideal for storing extra K-cups, utensils, and other essentials.
If building furniture is new to you, there is no need to worry about these drawers. I have written a post explaining how to build and fit drawers so you can complete them successfully!
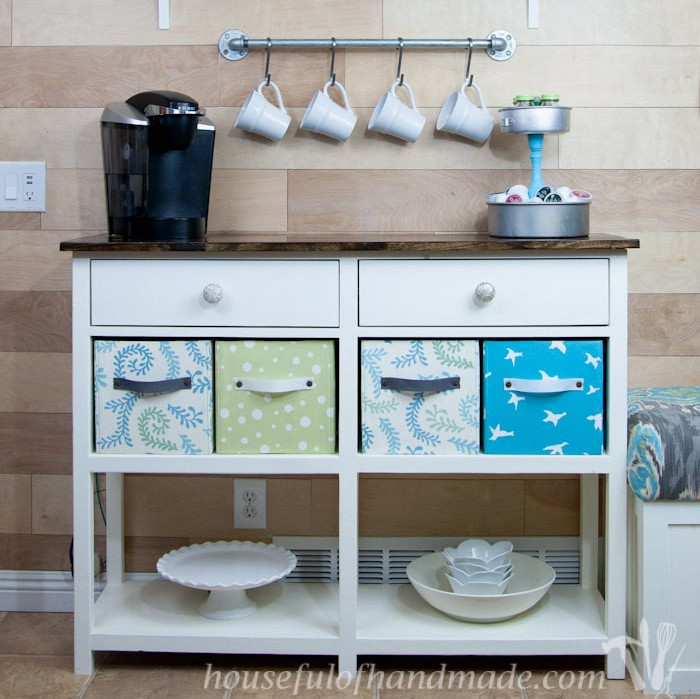
Coffee Bar Table Offering Plenty of Storage
Beneath the drawers, I added still more storage to the upper shelf using DIY fabric storage boxes. I trimmed the boxes to make them fit neatly inside the console table.
These attractive boxes provide additional storage for the coffee bar! We purchase K-cups in bulk (I never like being without coffee), and everything can be kept here for convenient refilling.
There is also space left over for storing kitchen items that are used less frequently.
An open shelf sits at the bottom of the console. It is perfect for showcasing dishes, decorations, and more!
We absolutely adore this console and the amount of storage it provides in our dining room.
Building a Coffee Station Table
The big box hardware store does not sell 2×2 boards in whitewood; it only carries the less expensive furring strips. I purchased the furring strips and struggled with them throughout the project.
They turned out usable (as you can see), but the next time I need 2x2s, I will purchase 2x4s and rip them to the correct dimensions with my table saw. That way, I can ensure the boards are straight and have clean corners rather than the rounded edges found on furring strips.
EXPERT TIP:
I suggest not cutting every piece before beginning construction. Instead, cut pieces as you proceed and verify your measurements once more before cutting. Lumber is not always precisely the size it is intended to be.
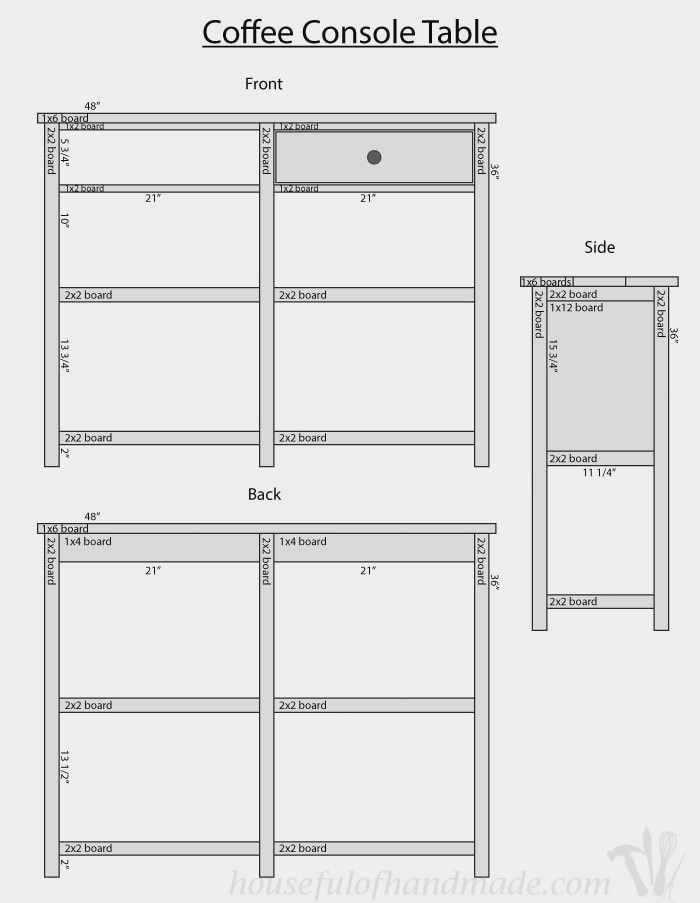
STEP 1- Construct the sides
Adjust your pocket hole jig for 1 1/2″ thick material. Make pocket holes at both ends of the shelf edging side boards.
With wood glue and 2 1/2″ finishing nails, fasten one shelf edging side board between two leg boards at the top.
Place the 1×12 side board between the legs, keeping it flush with the top piece. Attach it using wood glue and finishing nails.
I made the outside of the console even by pushing the 1×12 board flush against the exterior. I would not suggest doing this, since I needed to add extra boards inside the console to attach the drawer glides. The exterior will still look attractive without being flat.
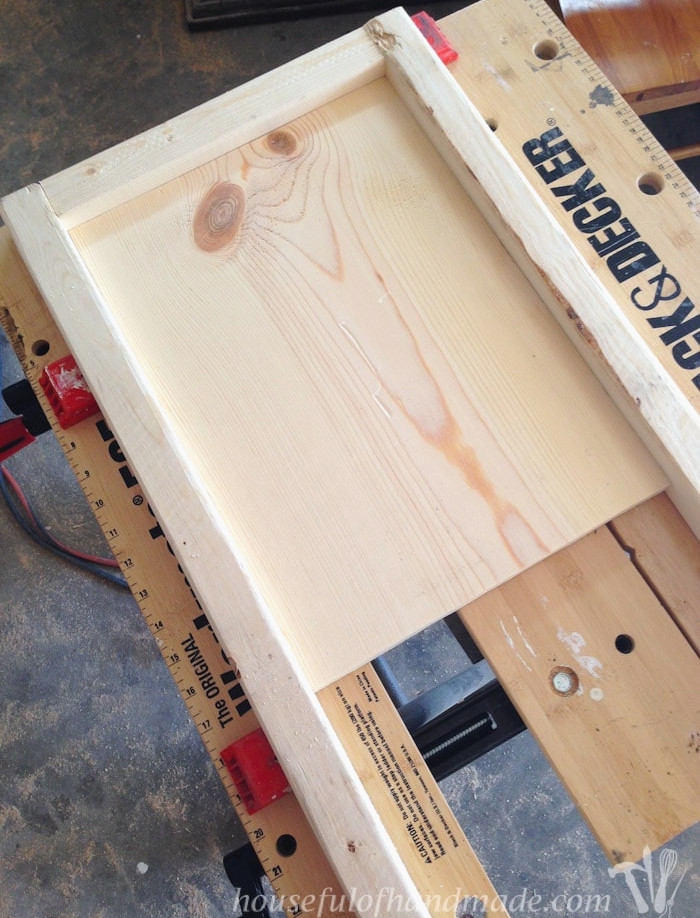
Place another shelf edging board flush against the 1×12 side board, then fasten it with glue and 2 1/2″ pocket hole screws.
Next, measure 2″ upward from the bottom and attach the last shelf edging board so its bottom aligns with the 2″ mark. This creates a 2″ opening beneath the console table. Modify this measurement if you prefer a larger opening.
Repeat these steps to create two identical sides.
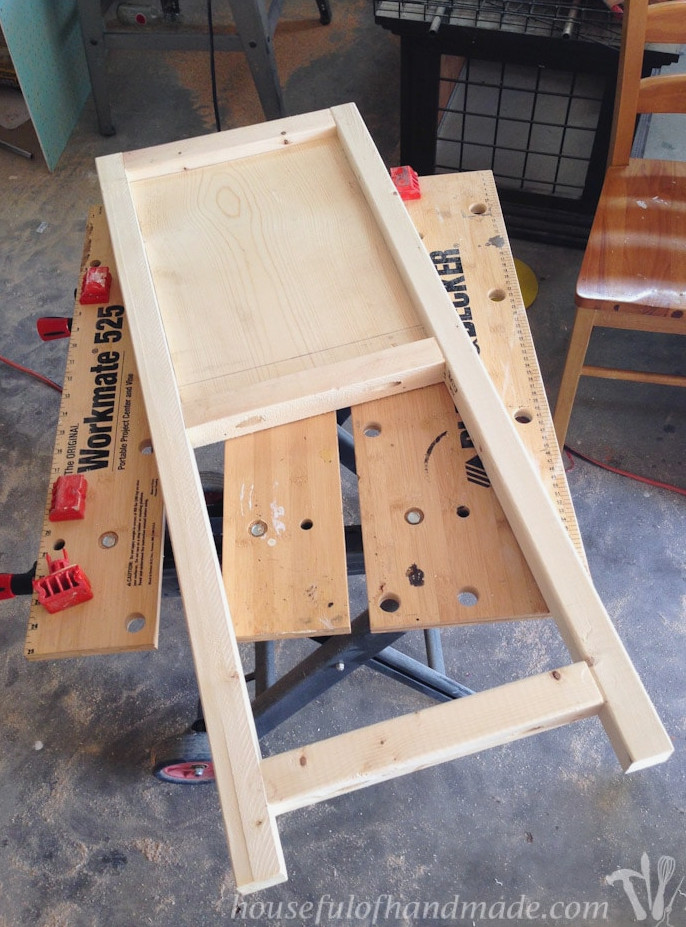
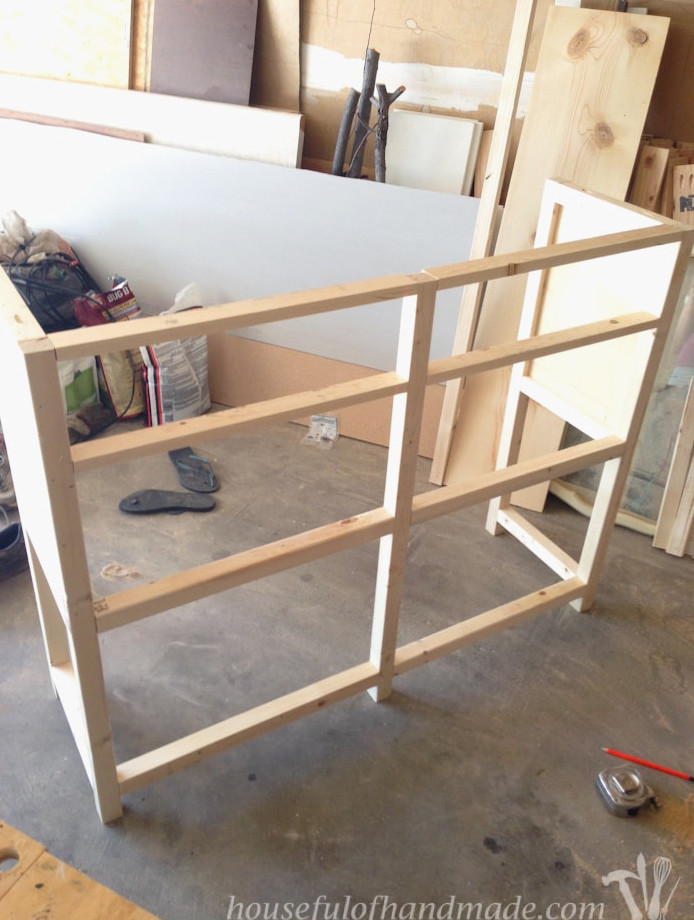
You may find it helpful to have another person assist at this stage. I worked alone and ended up in this situation! I also advise against assembling furniture while wearing flip flops.
STEP 2- Assemble the front frame
Set the pocket hole jig for 3/4″ thick material. Drill pocket holes into both sides of the front supports surrounding the drawer sections.
Fasten two front support pieces to a leg piece, aligning them flush with the top to form a T. Use wood glue and 1 1/4″ pocket hole screws to secure them.
From the underside of the top boards, measure down 5 3/4 inches. Position two additional front support pieces with their tops aligned to this measurement. Attach them with glue and 1 1/4″ pocket hole screws on the underside of the 1×2 boards.
Now connect the opposite ends of the front support pieces to the side pieces. Secure everything with glue and 1 1/4″ pocket hole screws.
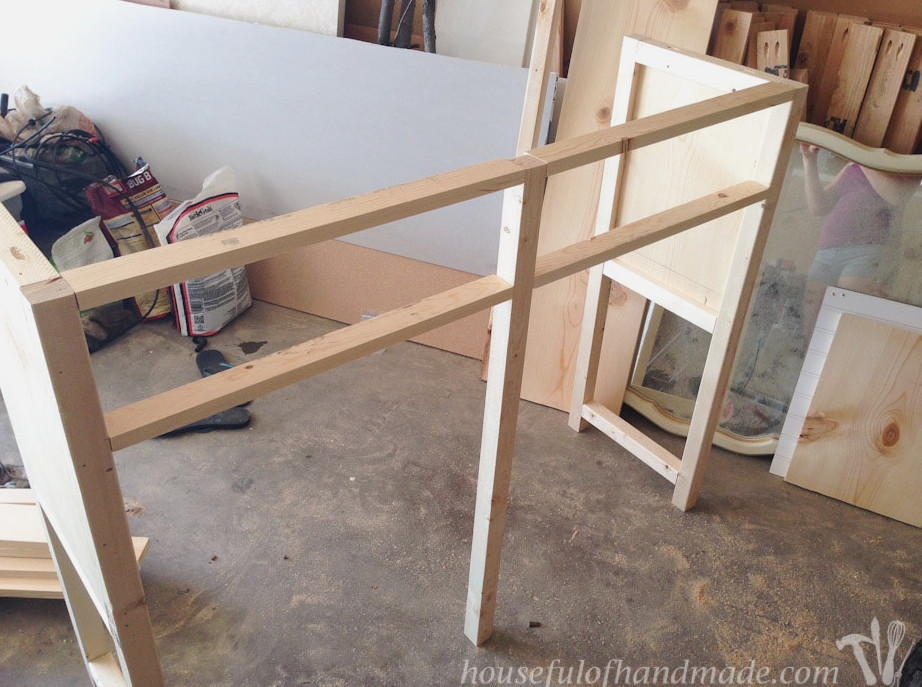
Next, create pocket holes in the sides of the front shelf edging pieces, setting the jig for 1 1/2″ thick material.
Attach the boards so they align with the boards on the
sides. Fasten them from below the 2×2 boards using 2 1/2″ pocket hole screws.
STEP 3- Attach the shelves
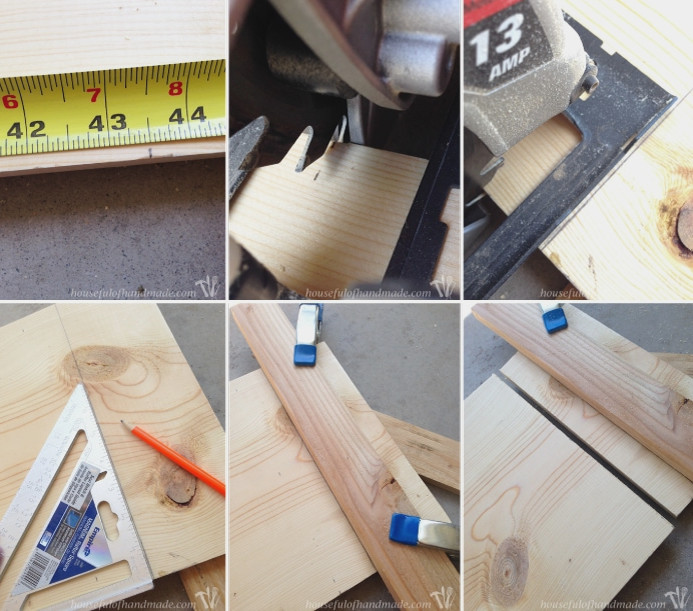
Cut the 1×12 boards to size for the shelves with a circular saw.
Making straight cuts with a circular saw can be frustrating, particularly if you are new to woodworking. Here is the method I use to achieve clean, perfectly straight cuts:
- First, mark the required measurement.
- Next, position the blade along the line where the cut should be made. I always place the blade on the outer side of the measurement mark so the piece does not end up a little too short, since the saw removes the width of the blade, known as the kerf.
- After positioning the blade, mark the side of the saw guide.
- Use the new mark to draw a completely straight line. A carpenter’s square is helpful for this step.
- Clamp a straight board along the marked line.
- Guide the saw against the clamped board as you cut. This will give you a perfectly straight cut!
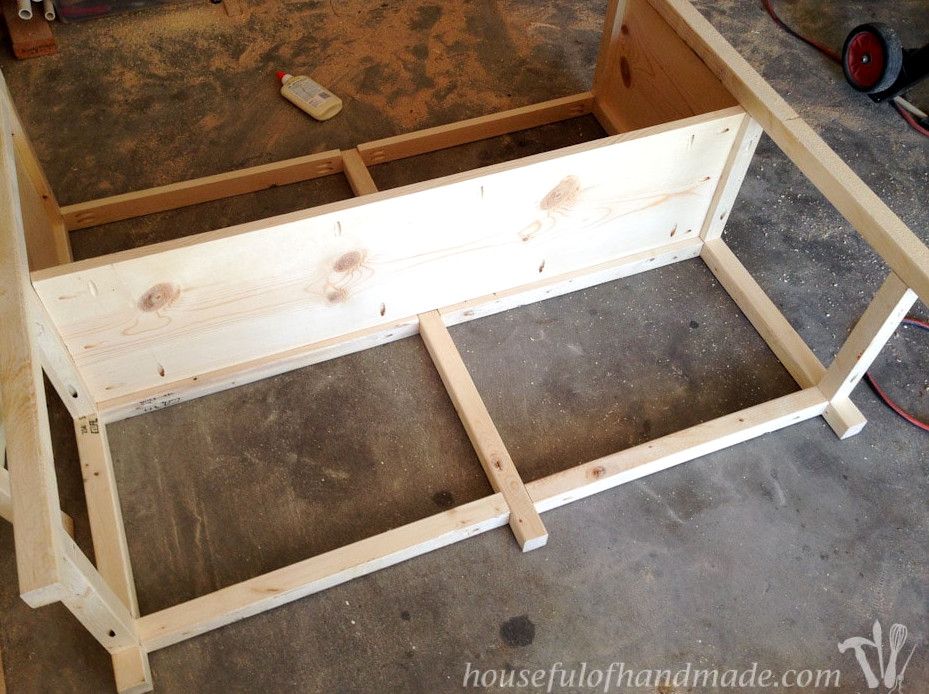
Make pocket holes intended for 3/4″ thick material around the outer edges of the shelf boards.
Position the shelves so their tops are level with the upper edges of the 2×2 shelf trim boards. Apply wood glue, then fasten them from beneath with 1 1/4″ pocket hole screws.
STEP 4- Finish off the back
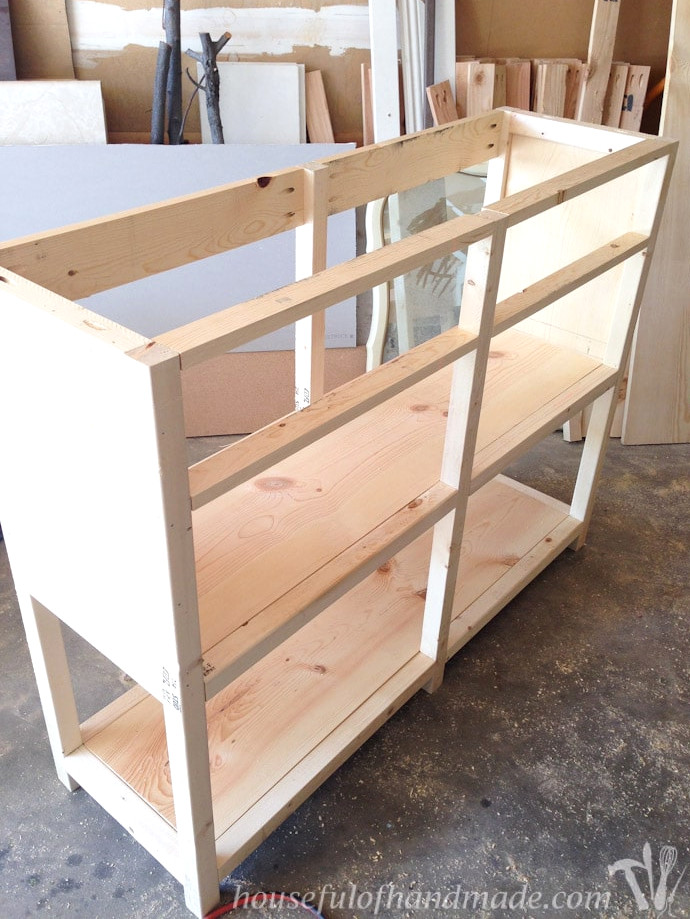
After both shelves are firmly attached, stand the console upright once more and install the back.
Drill pocket holes for 3/4″ thick material into both ends of the rear support pieces.
Fasten these pieces to the top of the final leg so they align with both the leg’s top and back edges. Use glue and 1 1/4″ pocket hole screws to secure them.
Attach them to the sides using the same method.
This is also the right time to install the drawer-slide support 2×2 between the two middle legs, centered within the drawer opening. This support is required for mounting the drawer slides. I skipped this step initially and had to add it afterward.
STEP 5- Finish the coffee bar table
At this stage, fill all nail holes and exposed pocket holes with wood filler.
I also chose to fill the channels left on the shelves and console sides because the corners of my 2x2s were rounded. Choosing higher-quality 2×2 boards can spare you plenty of extra work!
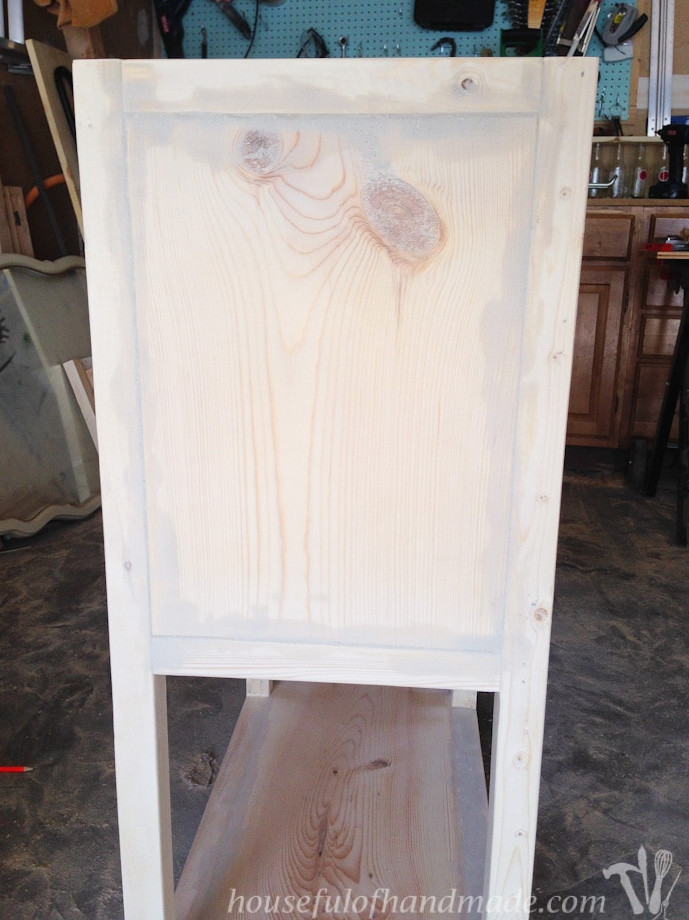
After the wood filler has completely dried, sand everything thoroughly. If the boards are especially rough, begin with 60- or 80-grit sandpaper, then move to 100, 150, and finally 220 grit.
That additional sanding can make inexpensive wood look beautiful under paint!
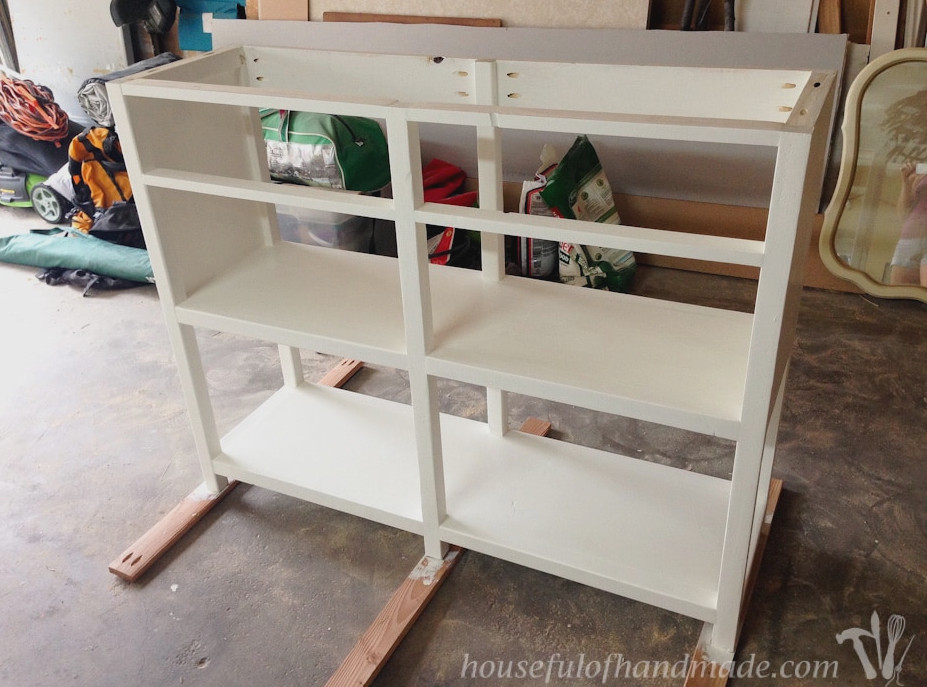
You can now paint your new coffee station table. I used three coats of a soft white shade, matching the color on ourbuilt in bench.
Since completing this project, I have learned much more about finishing furniture. You can learn how to achieve a smooth, professional-looking paint finish that will make your new project stand out.
STEP 6- Build the table top
While the paint dried, I began constructing the top. I decided to build and stain it before fastening it to the console.
Create pocket holes for 3/4″ thick material along both sides of the center top board. For a sturdy top, space the pocket holes every 6-8 inches.
Spread wood glue along the edges. Keep the boards clamped flat while joining them so the finished top remains smooth.
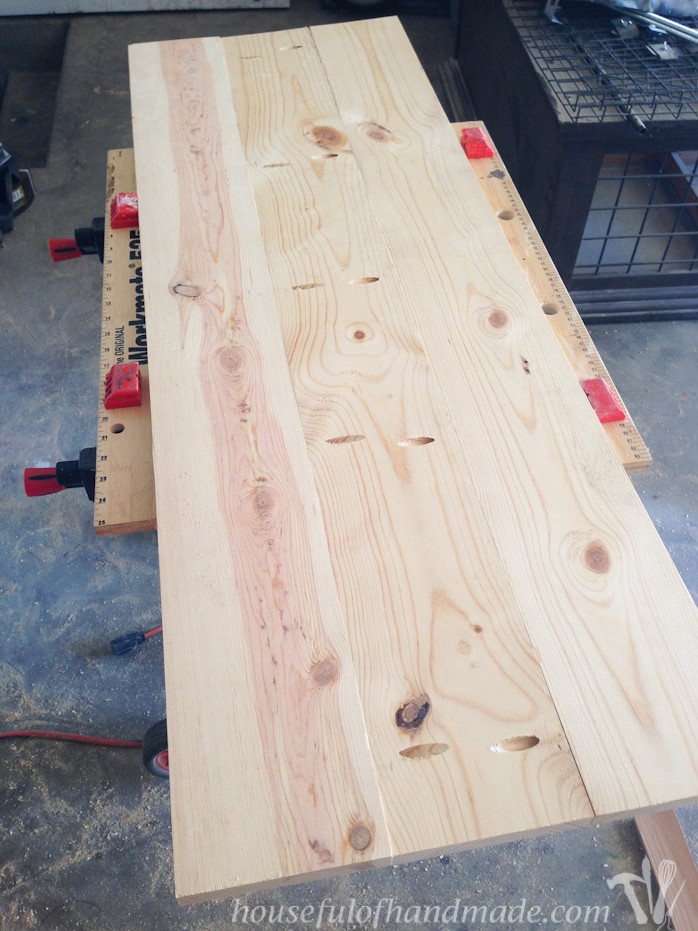
Afterward, sand the surface and apply the wood stain.
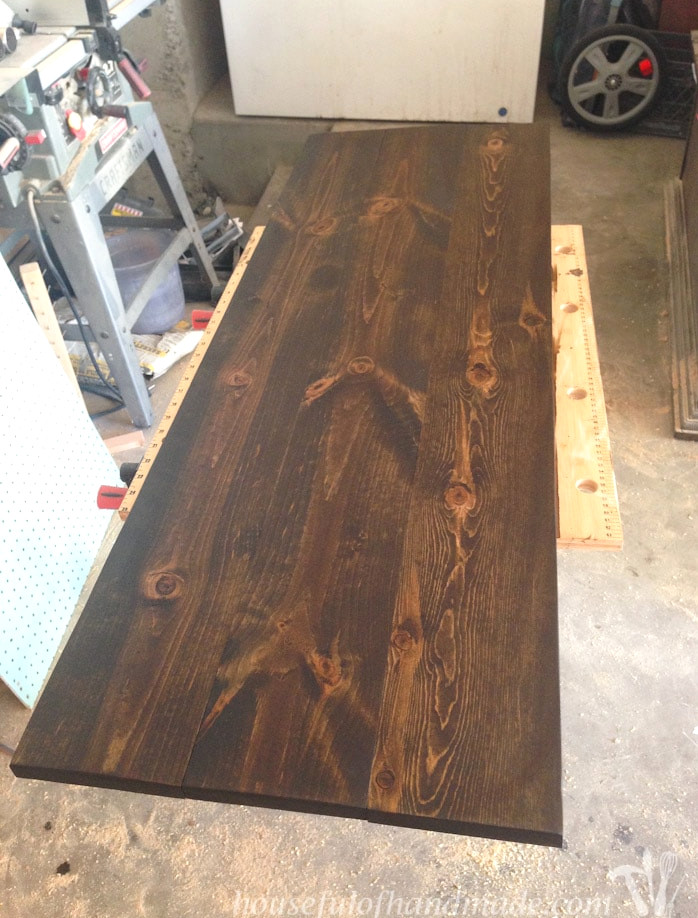
When the stain has dried, seal the top with polyurethane, which is especially important around water, such as at our coffee bar. I applied one coat over the entire piece—top, bottom, and sides—before attaching it to the base.
Make a few pocket holes for 3/4″ thick material on the rear of the 1×4 back boards. Also drill several countersunk holes in the 1×2 drawer-support boards.
Position the top in the center of the coffee bar table, then fasten it with screws.
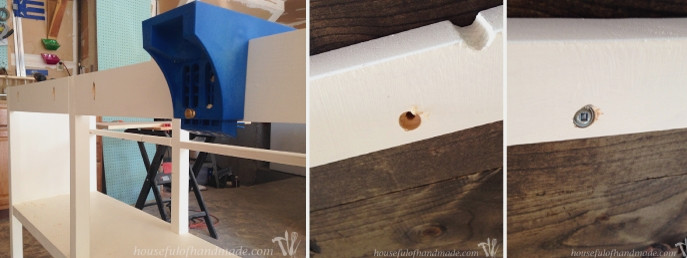
Finish the top and its sides by applying the remaining two coats of polyurethane.
For an item used in the kitchen, I would not suggest applying fewer than three coats of polyurethane.
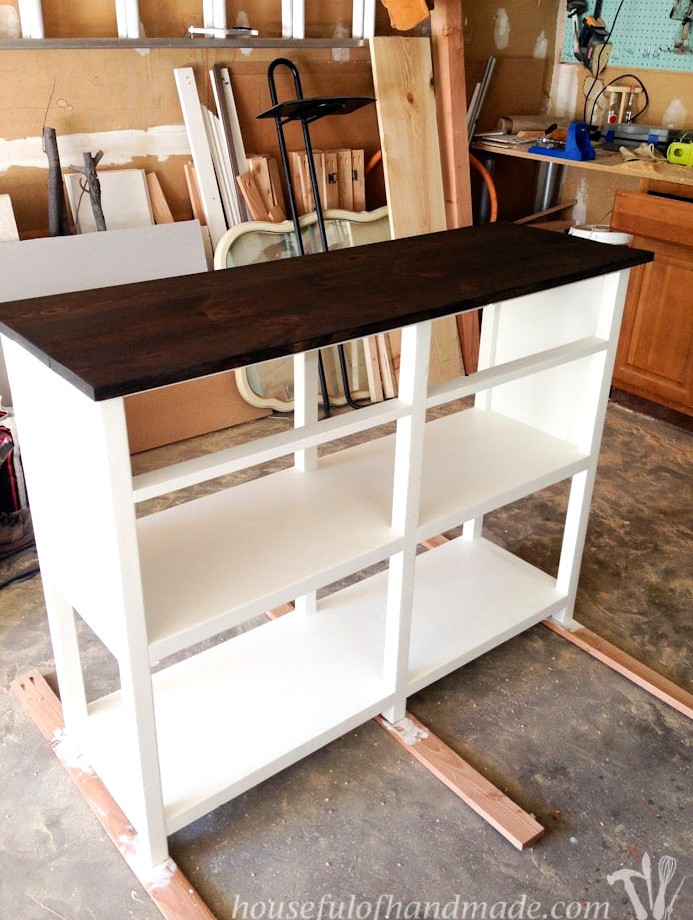
The key detail to remember when making a drawer box is that it must be square. Take time to adjust your saw blades so they produce precise 90 degree cuts.
EXPERT TIP:
Cut the two side pieces and the two front/back pieces for each drawer box simultaneously so they are exactly the same length. This will help ensure that your drawer box stays square.
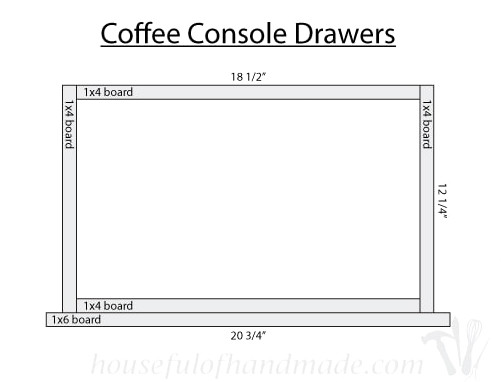
Drill two pocket holes intended for 3/4″ thick material into each end of the drawer box front/back boards.
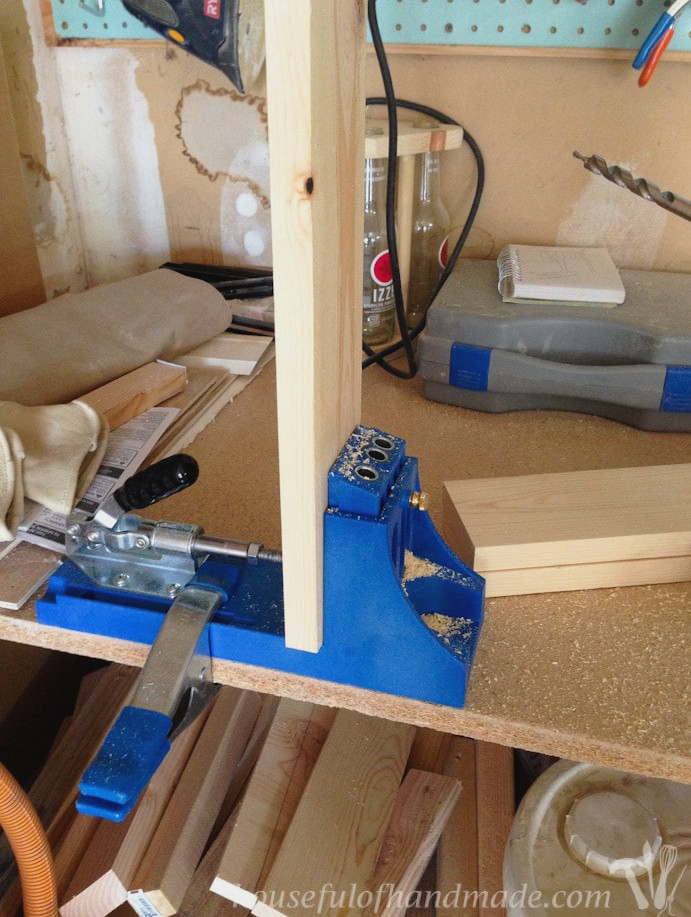
To keep the boxes properly squared, use a Right Angle Clamp made for use with Kreg pocket holes while assembling the drawers. Clamps can be expensive, but they are invaluable during construction.
Use 1 1/4″ pocket hole screws and wood glue to fasten the two side boards to the front/back boards. Verify the box is square with a 7-inch Speed Square.
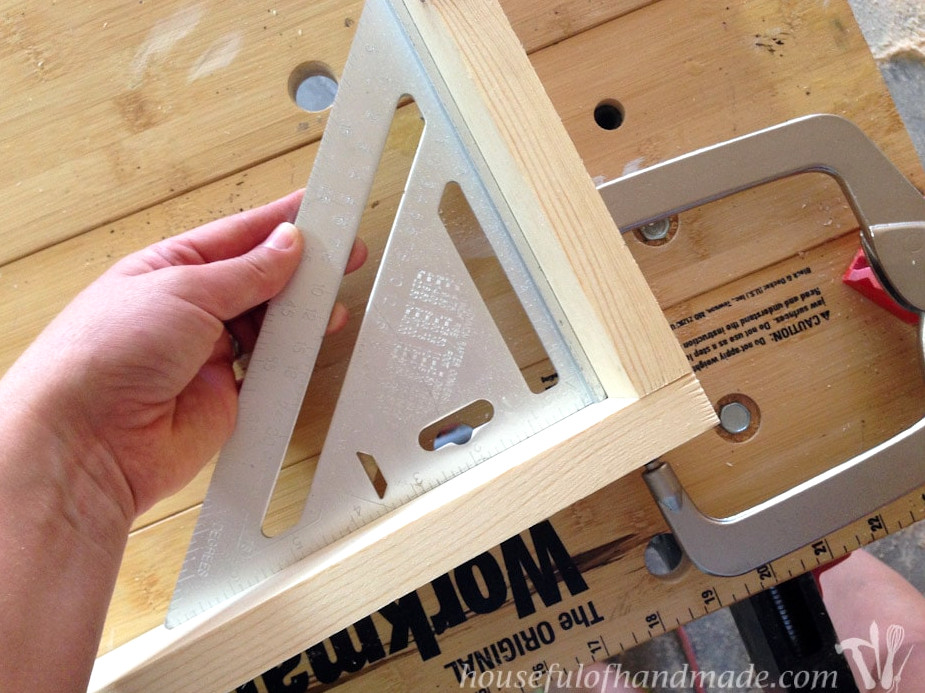
Position the pocket holes on the drawer box’s exterior. They will be covered by the drawer front or located at the back of the drawer inside the furniture, so they will remain out of sight.
Make another drawer box using the same steps.
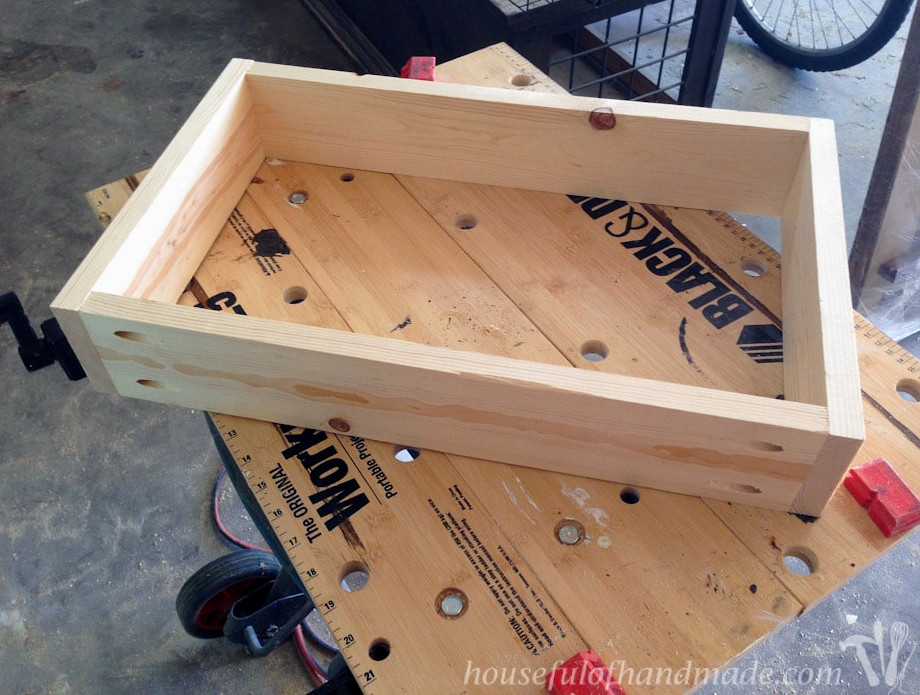
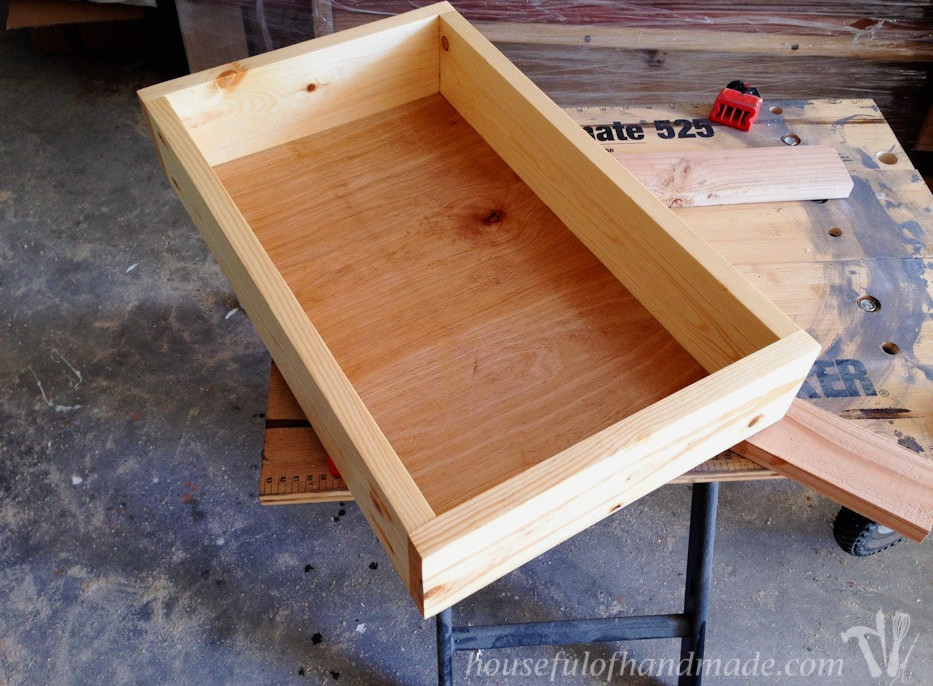
Trim the 1/4″ plywood to be 1/4″ smaller on every side. Fasten it to the drawer bottom with wood glue and finishing nails.
Since I will not use these drawers for heavy loads, these easy-to-make drawers should work well and have lasted for years.
STEP 7- Fit the drawers
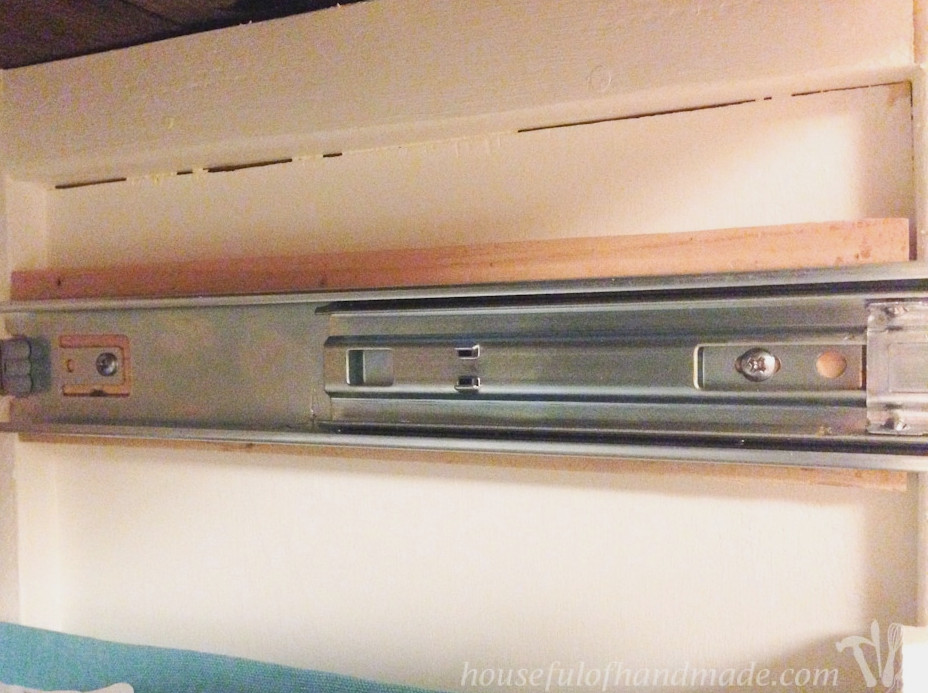
These drawer boxes are intended for ball bearing drawer slides, which need 1/2″ of clearance on both sides.
If you left the sides even with the outside of the 2×2 legs, as I did, you will need to install a 3/4″ blocking piece inside the side sections. When the sides are flush with the inside, no blocking is required.
For detailed directions and helpful advice, read how to install drawers with ball bearing drawer slides.
Position the drawer front so it is centered in the opening.
Hold the drawer fronts in place temporarily, then fasten them permanently from the inside using a few wood screws.
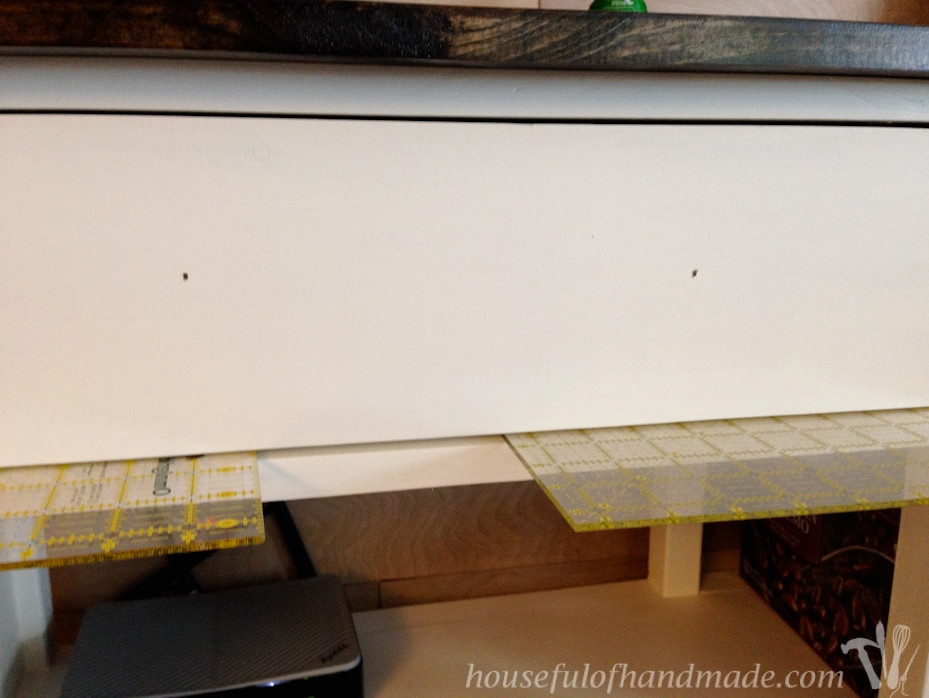
Fill the nail holes and refresh the paint as needed. Afterward, attach the knobs or pulls.
I discovered these playful knobs at World Market, and they look wonderful on our coffee bar table!
Your coffee station table is now complete! Decorate it to create the ideal coffee bar, or use it as a console table wherever you need extra storage.
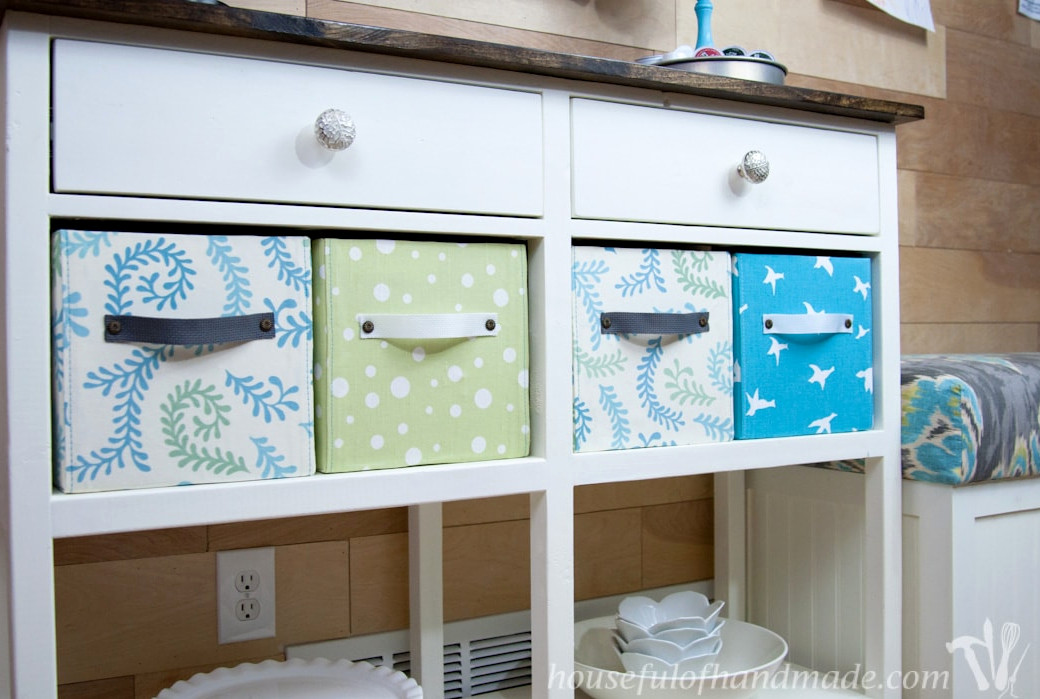
Be sure to view the finished coffee bar reveal as well, featuring all the coffee accessories and storage solutions! It is one of my favorite spots in our house.
Enjoy building!